In this third part of our deeper look at 3D game rendering, we'll be focusing what can happen to the 3D world after the vertex processing has done and the scene has been rasterized. Texturing is one of the most important stages in rendering, even though all that is happening is the colors of a two dimensional grid of colored blocks are calculated and changed.
The majority of the visual effects seen in games today are down to the clever use of textures -- without them, games would dull and lifeless. So let's get dive in and see how this all works!
As always, if you're not quite ready for a deep dive into texturing, don't panic -- you can get started with our 3D Game Rendering 101. But once you're past the basics, do read on for our next look at the world of 3D graphics.
Let's start simple
Pick any top selling 3D game from the past 12 months and they will all share one thing in common: the use of texture maps (or just textures). This is such a common term that most people will conjure the same image, when thinking about textures: a simple, flat square or rectangle that contains a picture of a surface (grass, stone, metal, clothing, a face, etc).
But when used in multiple layers and woven together using complex arithmetic, the use of these basic pictures in a 3D scene can produce stunningly realistic images. To see how this is possible, let's start by skipping them altogether and seeing what objects in a 3D world can look like without them.
As we have seen in previous articles, the 3D world is made up of vertices -- simple shapes that get moved and then colored in. These are then used to make primitives, which in turn are squashed into a 2D grid of pixels. Since we're not going to use textures, we need to color in those pixels.
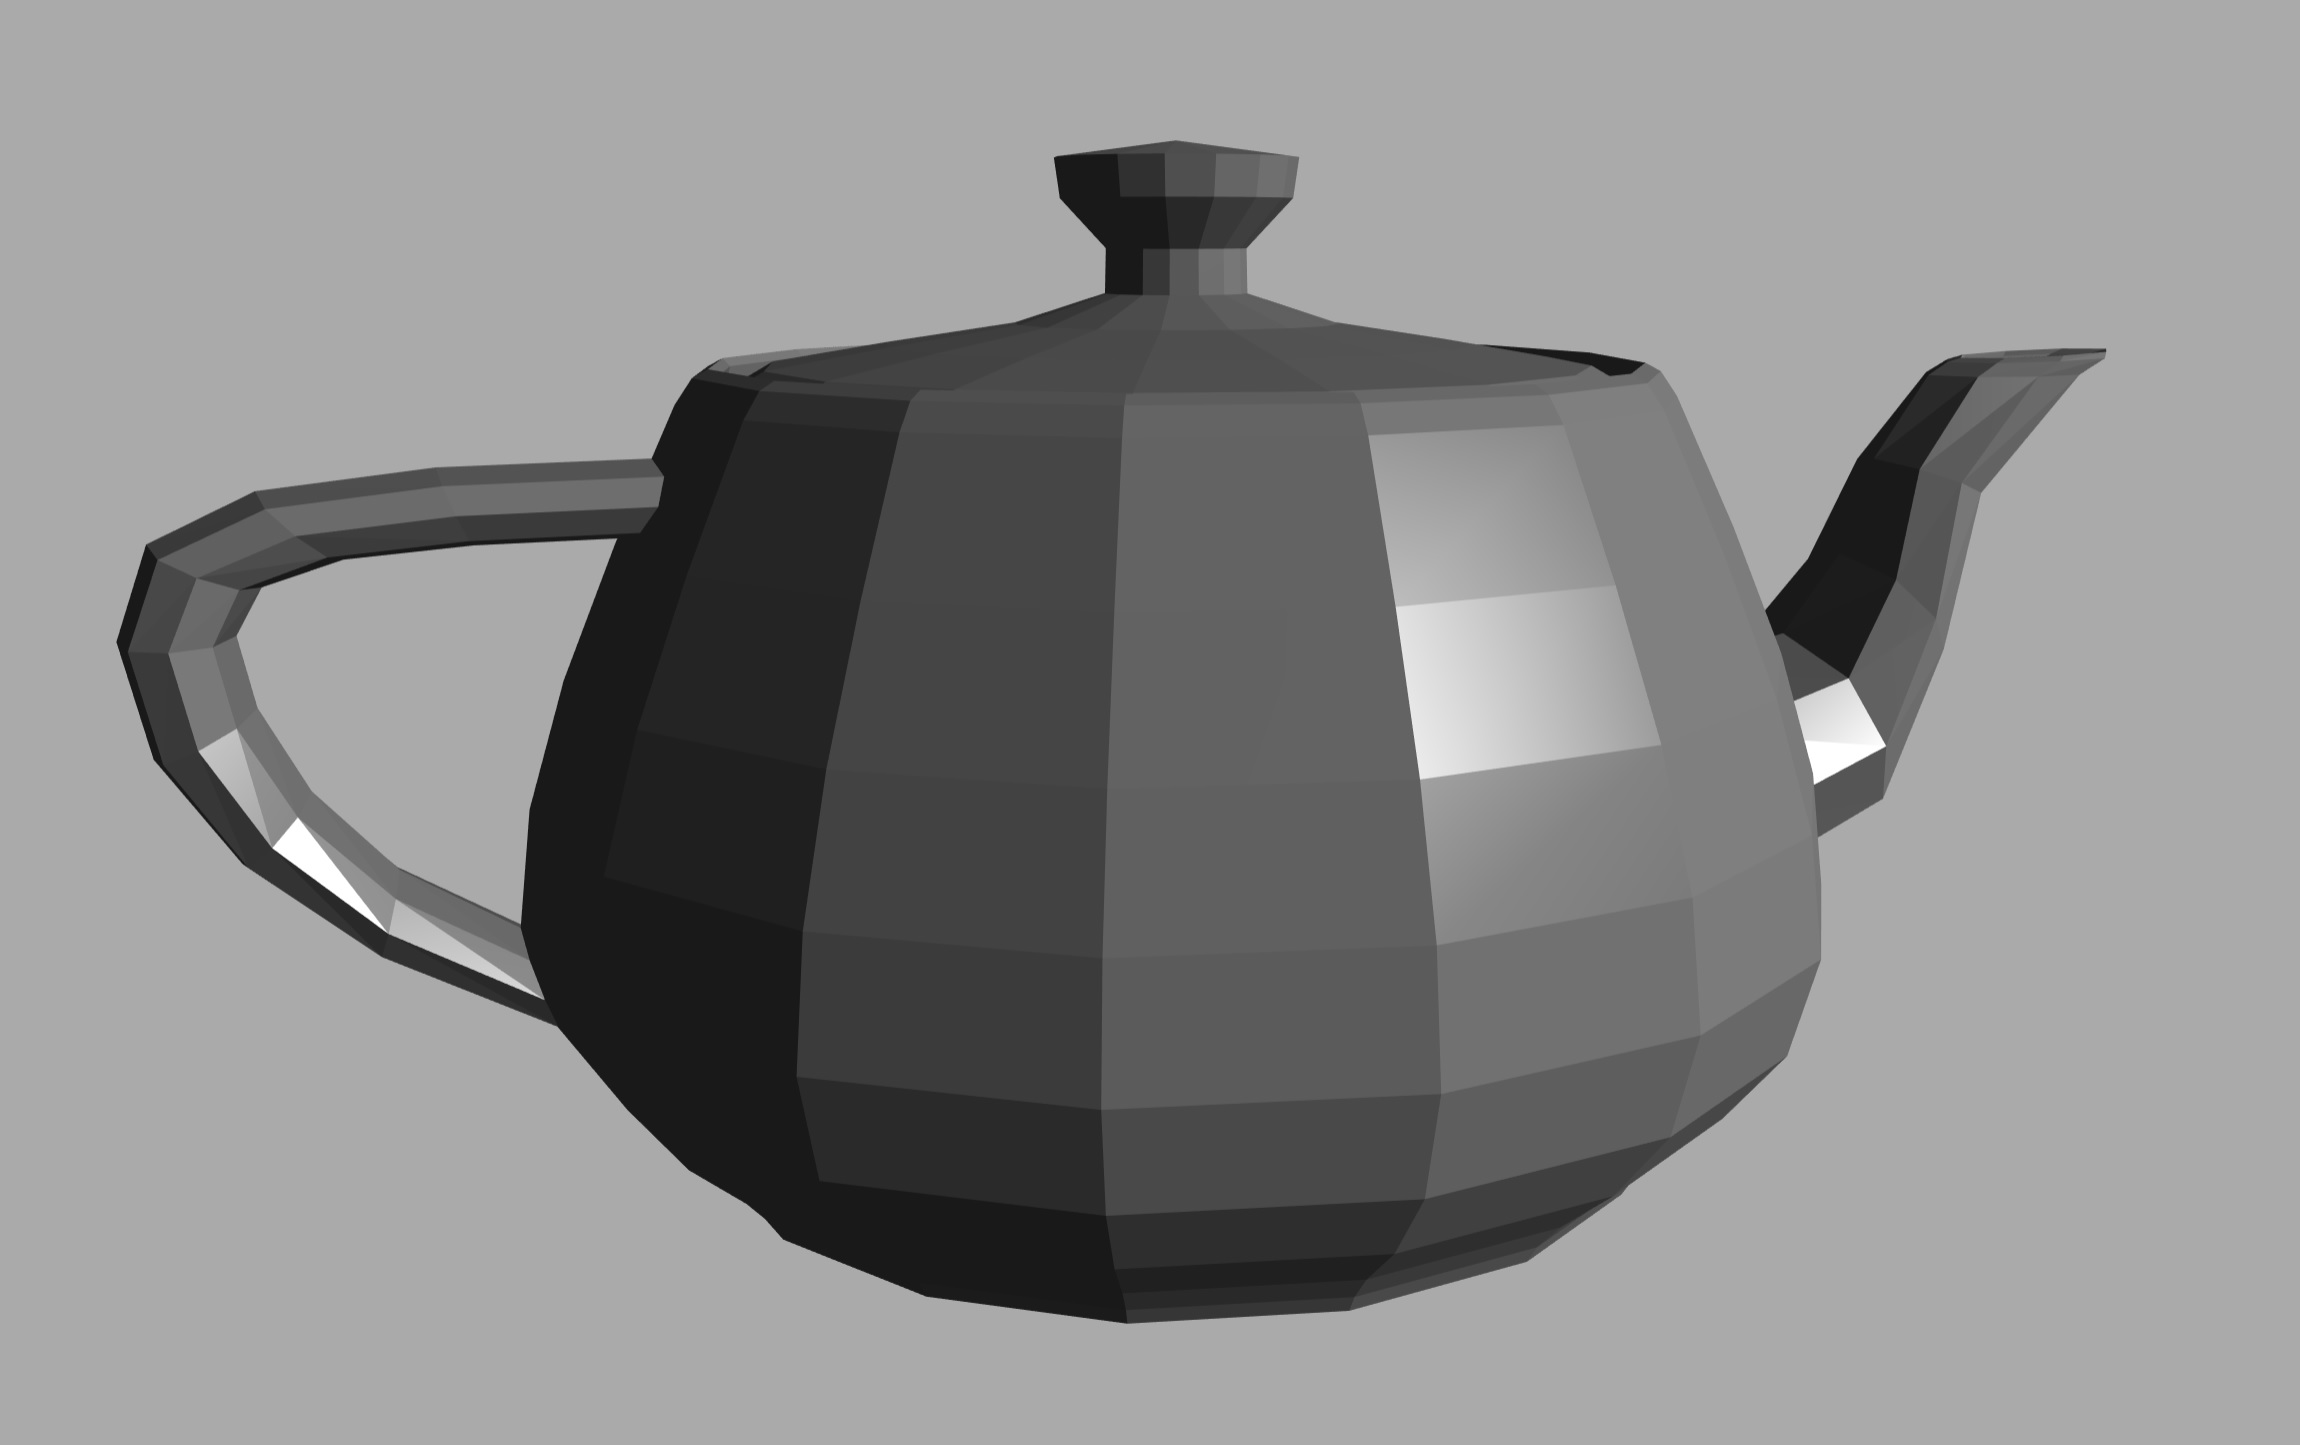
One method that can be used, called flat shading, involves taking the color of the first vertex of the primitive, and then using that color for all of the pixels that get covered by the shape in the raster. It looks something like this:

This is obviously not a realistic teapot, not least because the surface color is all wrong. The colors jump from one level to another, there is no smooth transition. One solution to this problem could be to use something called Gouraud shading.
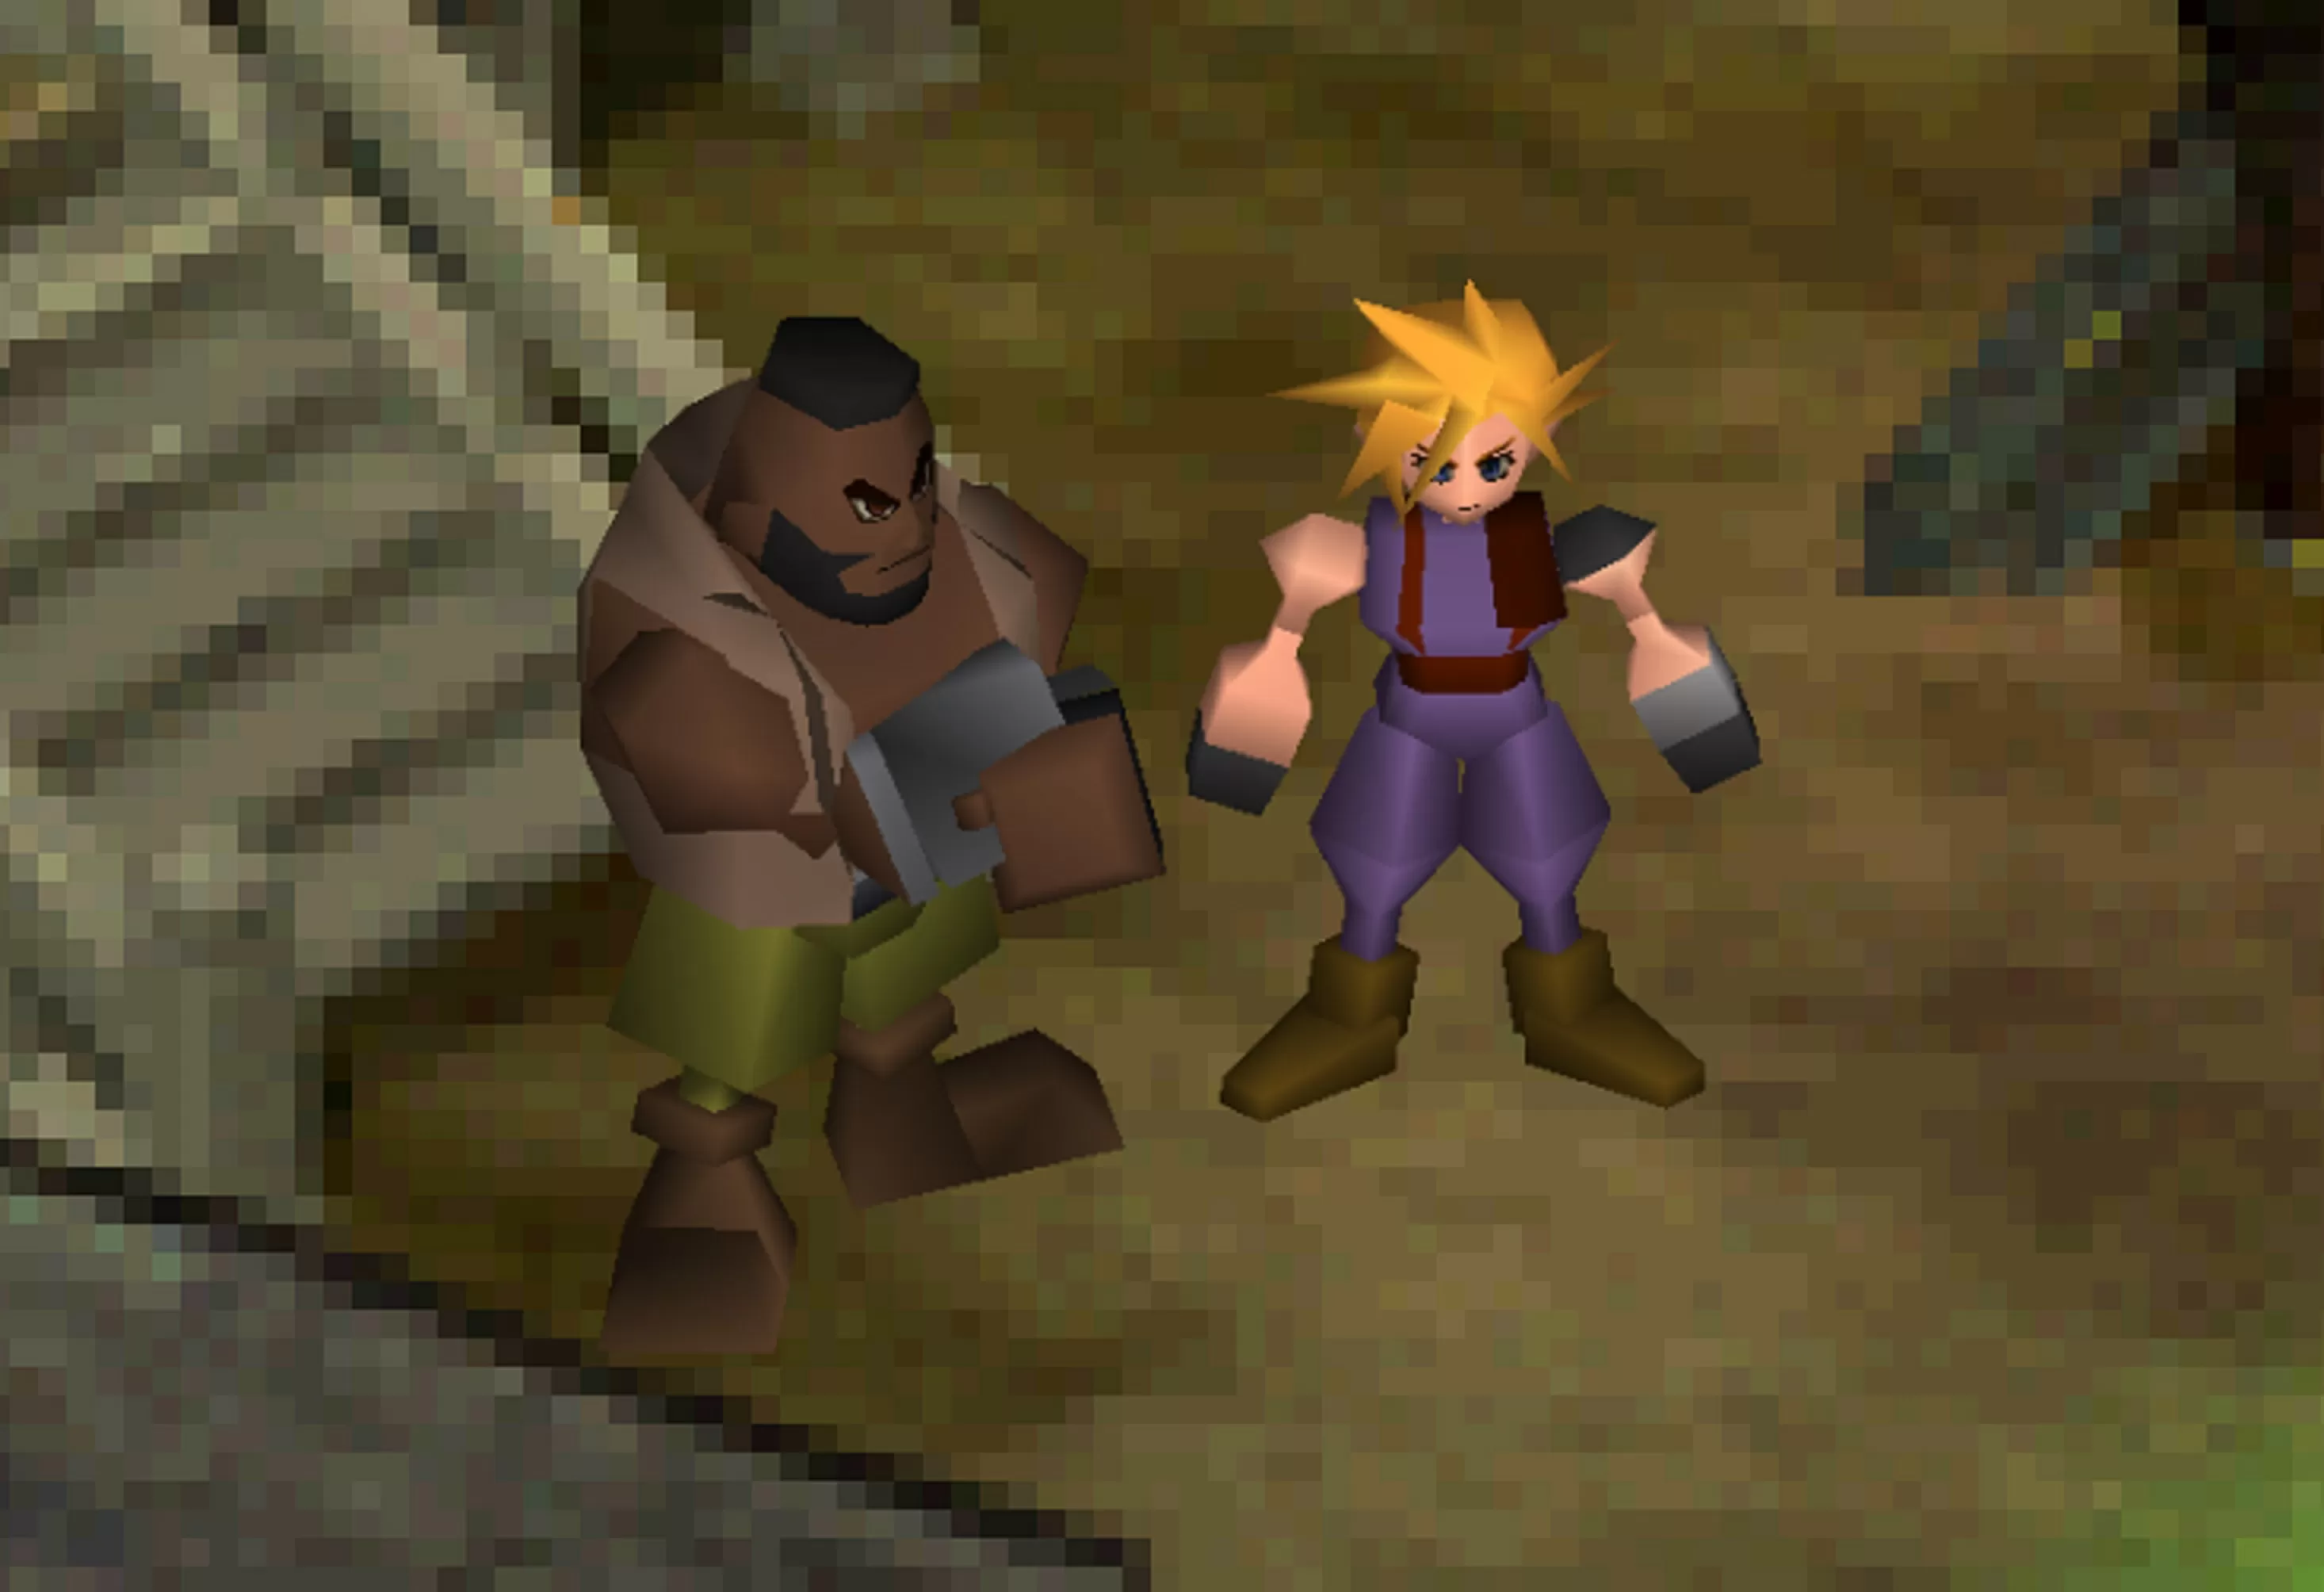
This is a process which takes the colors of the vertices and then calculates how the color changes across the surface of the triangle. The math used is known as linear interpolation, which sounds fancy but in reality means if one side of the primitive has the color 0.2 red, for example, and the other side is 0.8 red, then the middle of the shape has a color midway between 0.2 and 0.8 (i.e. 0.5).
It's relatively simple to do and that's its main benefit, as simple means speed. Many early 3D games used this technique, because the hardware performing the calculations was limited in what it could.
Barrett and Cloud in their full Gouraud shaded glory (Final Fantasy VII - 1997)

But even this has problems, because if a light is pointing right at the middle of a triangle, then its corners (the vertices) might not capture this properly. This means that highlights caused by the light could be missed entirely.
While flat and Gouraud shading have their place in the rendering armory, the above examples are clear candidates for the use of textures to improve them. And to get a good understanding of what happens when a texture is applied to a surface, we'll pop back in time... all the way back to 1996.
A quick bit of gaming and GPU history
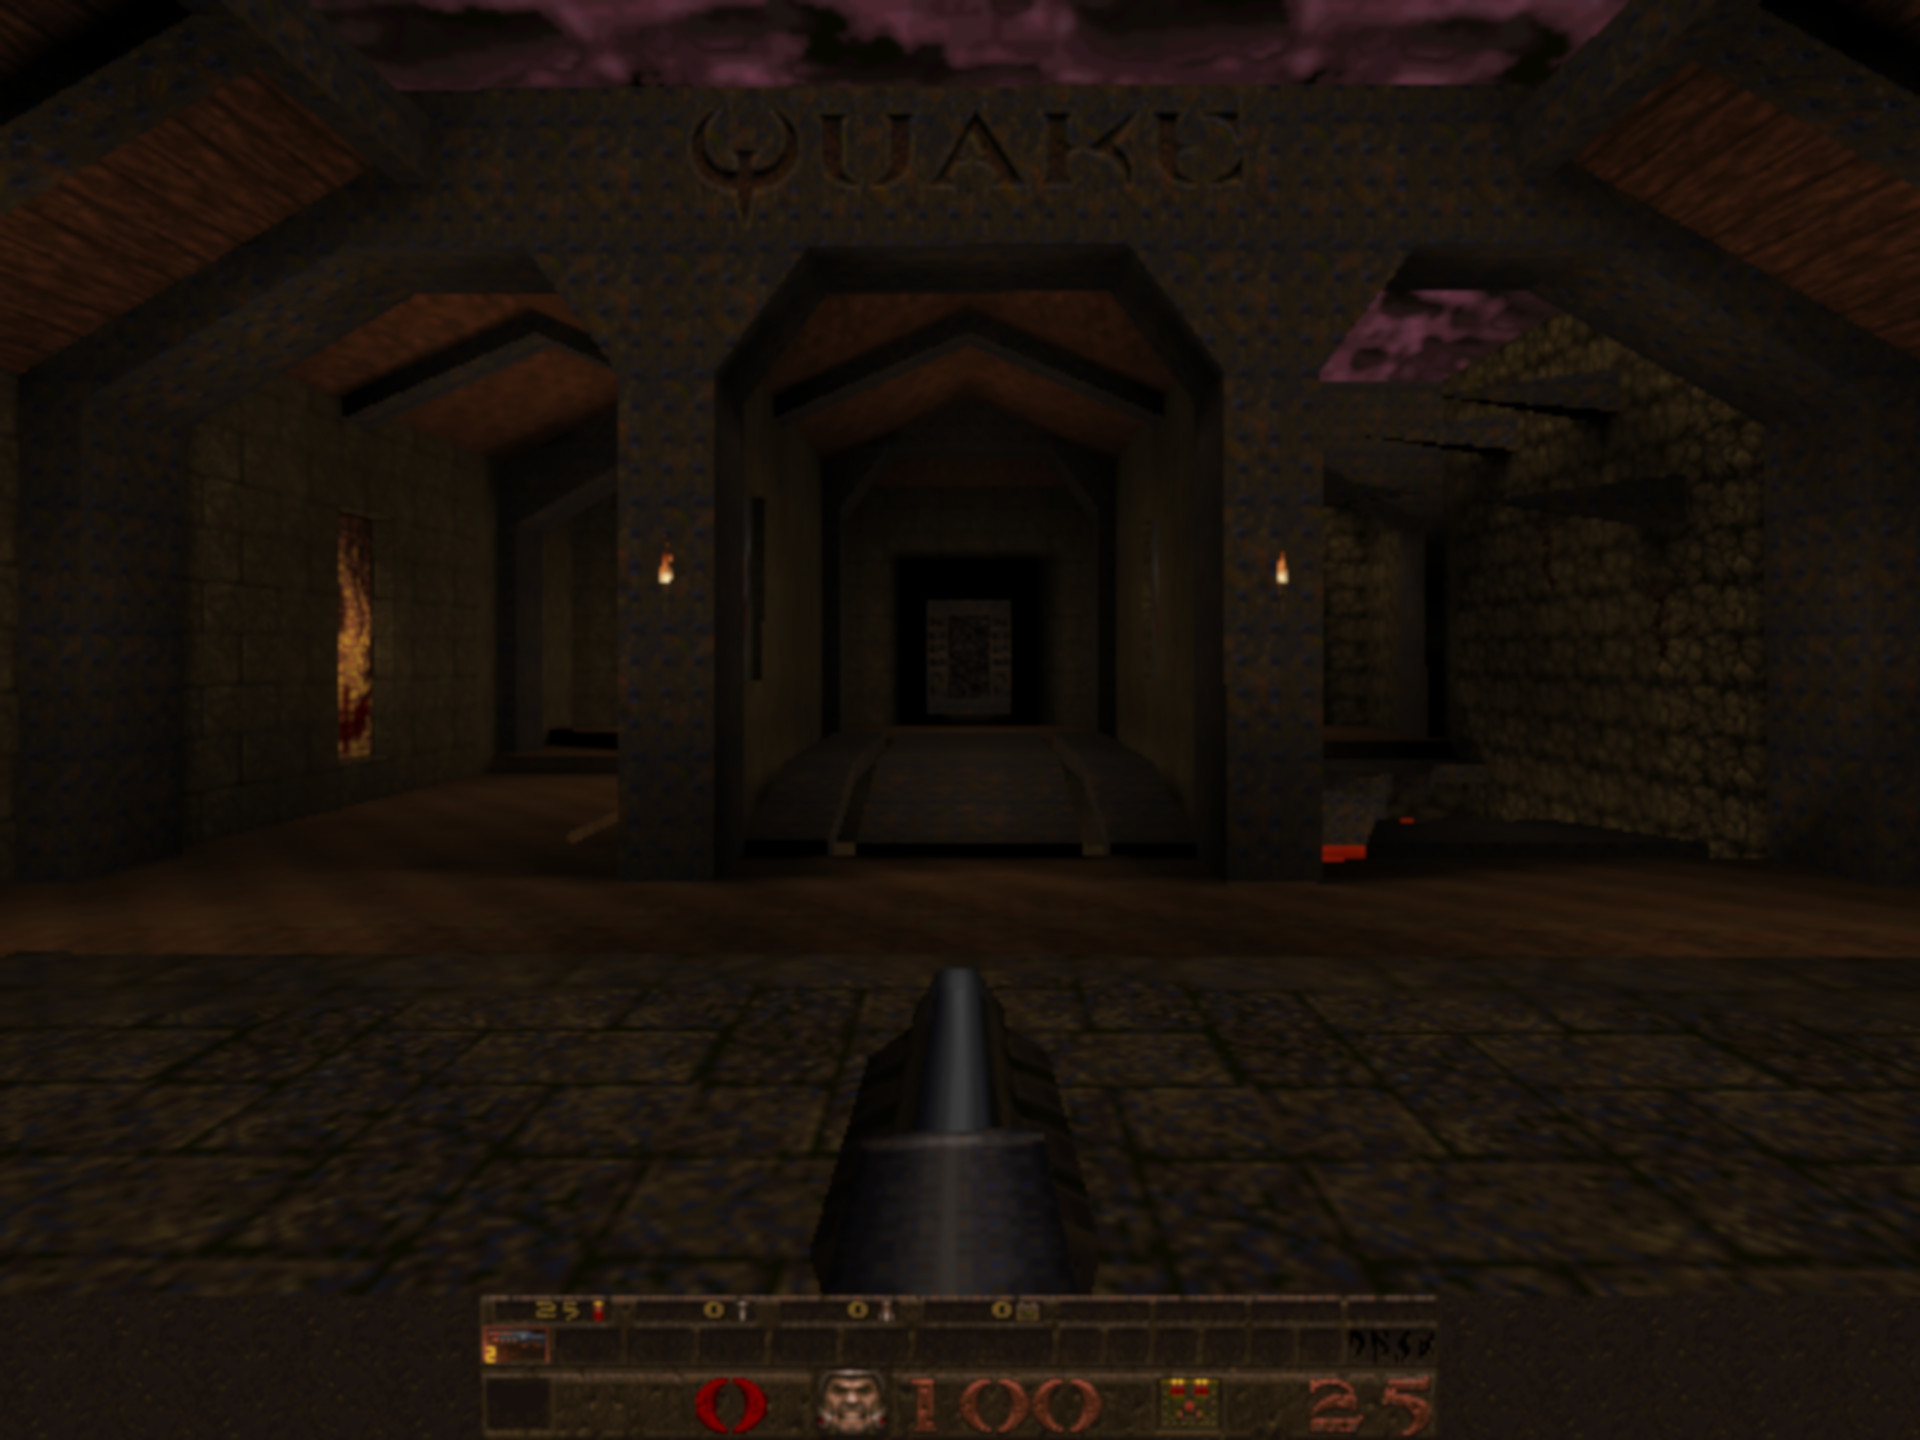
Quake was released some 23 years ago, a landmark game by id Software. While it wasn't the first game to use 3D polygons and textures to render the environment, it was definitely one of the first to use them all so effectively.
Something else it did, was to showcase what could be done with OpenGL (the graphics API was still in its first revision at that time) and it also went a very long way to helping the sales of the first crop of graphics cards like the Rendition Verite and the 3Dfx Voodoo.

Vertex lighting and basic textures. Pure 1996, pure Quake.
Compared to today's standards, the Voodoo was exceptionally basic: no 2D graphics support, no vertex processing, and just the very basics of pixel processing. It was a beauty nonetheless:

Image: VGA Museum
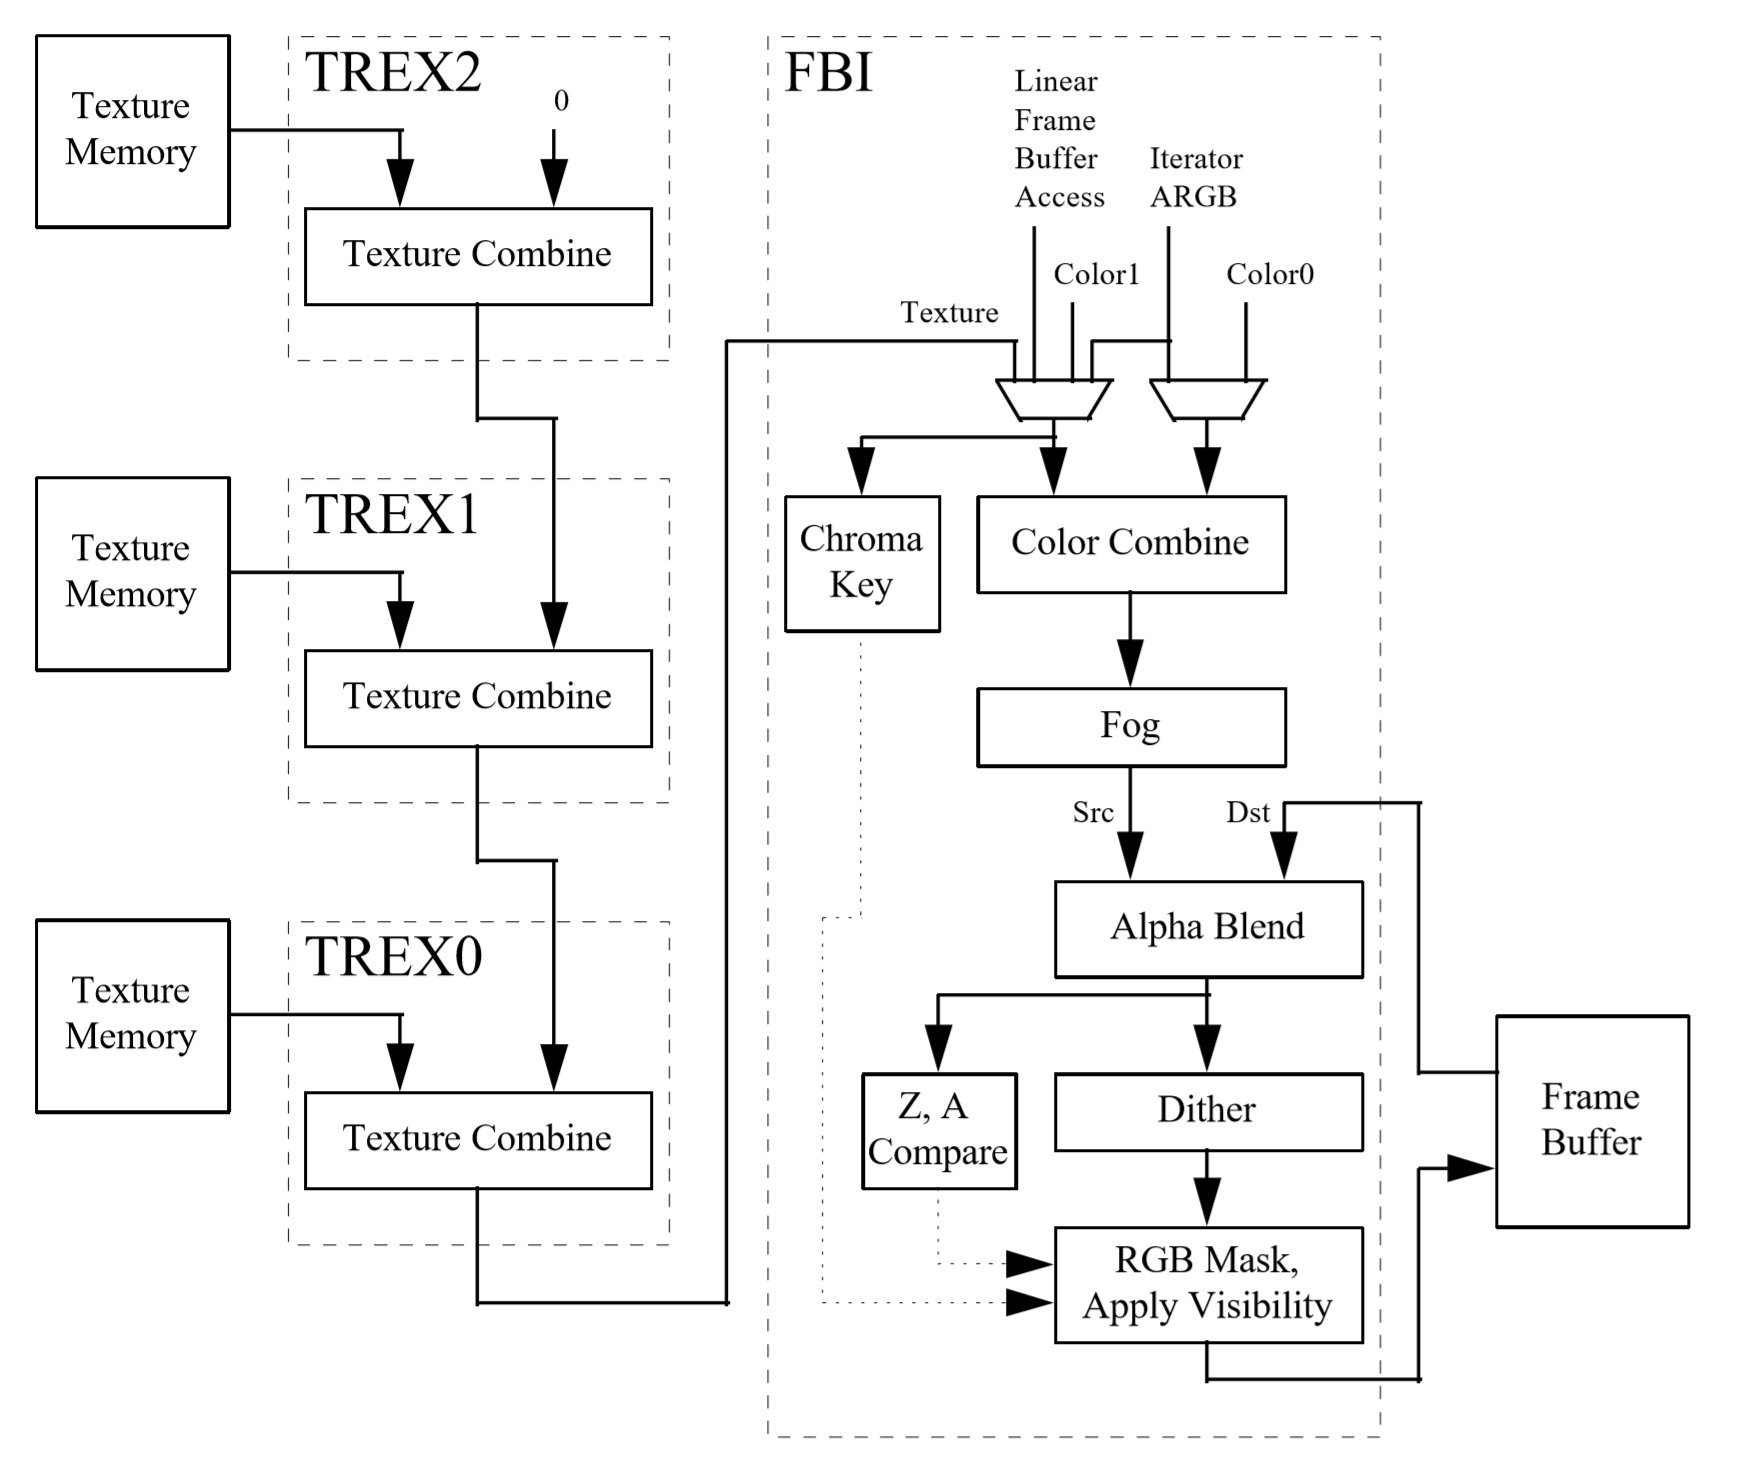
It had an entire chip (the TMU) for getting a pixel from a texture and another chip (the FBI) to then blend it with a pixel from the raster. It could do a couple of additional processes, such as doing fog or transparency effects, but that was pretty much it.
If we take a look at an overview of the architecture behind the design and operation of the graphics card, we can see how these processes work.

3Dfx Technical Reference document. Source: Falconfly Central
The FBI chip takes two color values and blends them together; one of them can be a value from a texture. The blending process is mathematically quite simple but varies a little between what exactly is being blended, and what API is being used to carry out the instructions.
If we look at what Direct3D offers in terms of blending functions and blending operations, we can see that each pixel is first multiplied by a number between 0.0 and 1.0. This determines how much of the pixel's color will influence the final appearance. Then the two adjusted pixel colors are either added, subtracted, or multiplied; in some functions, the operation is a logic statement where something like the brightest pixel is always selected.

Image: Taking Initiative tech blog
The above image is an example of how this works in practice; note that for the left hand pixel, the factor used is the pixel's alpha value. This number indicates how transparent the pixel is.
The rest of the stages involve applying a fog value (taken from a table of numbers created by the programmer, then doing the same blending math); carrying out some visibility and transparency checks and adjustments; before finally writing the color of the pixel to the memory on the graphics card.
Why the history lesson? Well, despite the relative simplicity of the design (especially compared to modern behemoths), the process describes the fundamental basics of texturing: get some color values and blend them, so that models and environments look how they're supposed to in a given situation.
Today's games still do all of this, the only difference is the amount of textures used and the complexity of the blending calculations. Together, they simulate the visual effects seen in movies or how light interacts with different materials and surfaces.
The basics of texturing
To us, a texture is a flat, 2D picture that gets applied to the polygons that make up the 3D structures in the viewed frame. To a computer, though, it's nothing more than a small block of memory, in the form of a 2D array. Each entry in the array represents a color value for one of the pixels in the texture image (better known as texels - texture pixels).
Every vertex in a polygon has a set of 2 coordinates (usually labelled as u,v) associated with it that tells the computer what pixel in the texture is associated with it. The vertex themselves have a set of 3 coordinates (x,y,z), and the process of linking the texels to the vertices is called texture mapping.
To see this in action, let's turn to a tool we've used a few times in this series of articles: the Real Time Rendering WebGL tool. For now, we'll also drop the z coordinate from the vertices and keep everything on a flat plane.

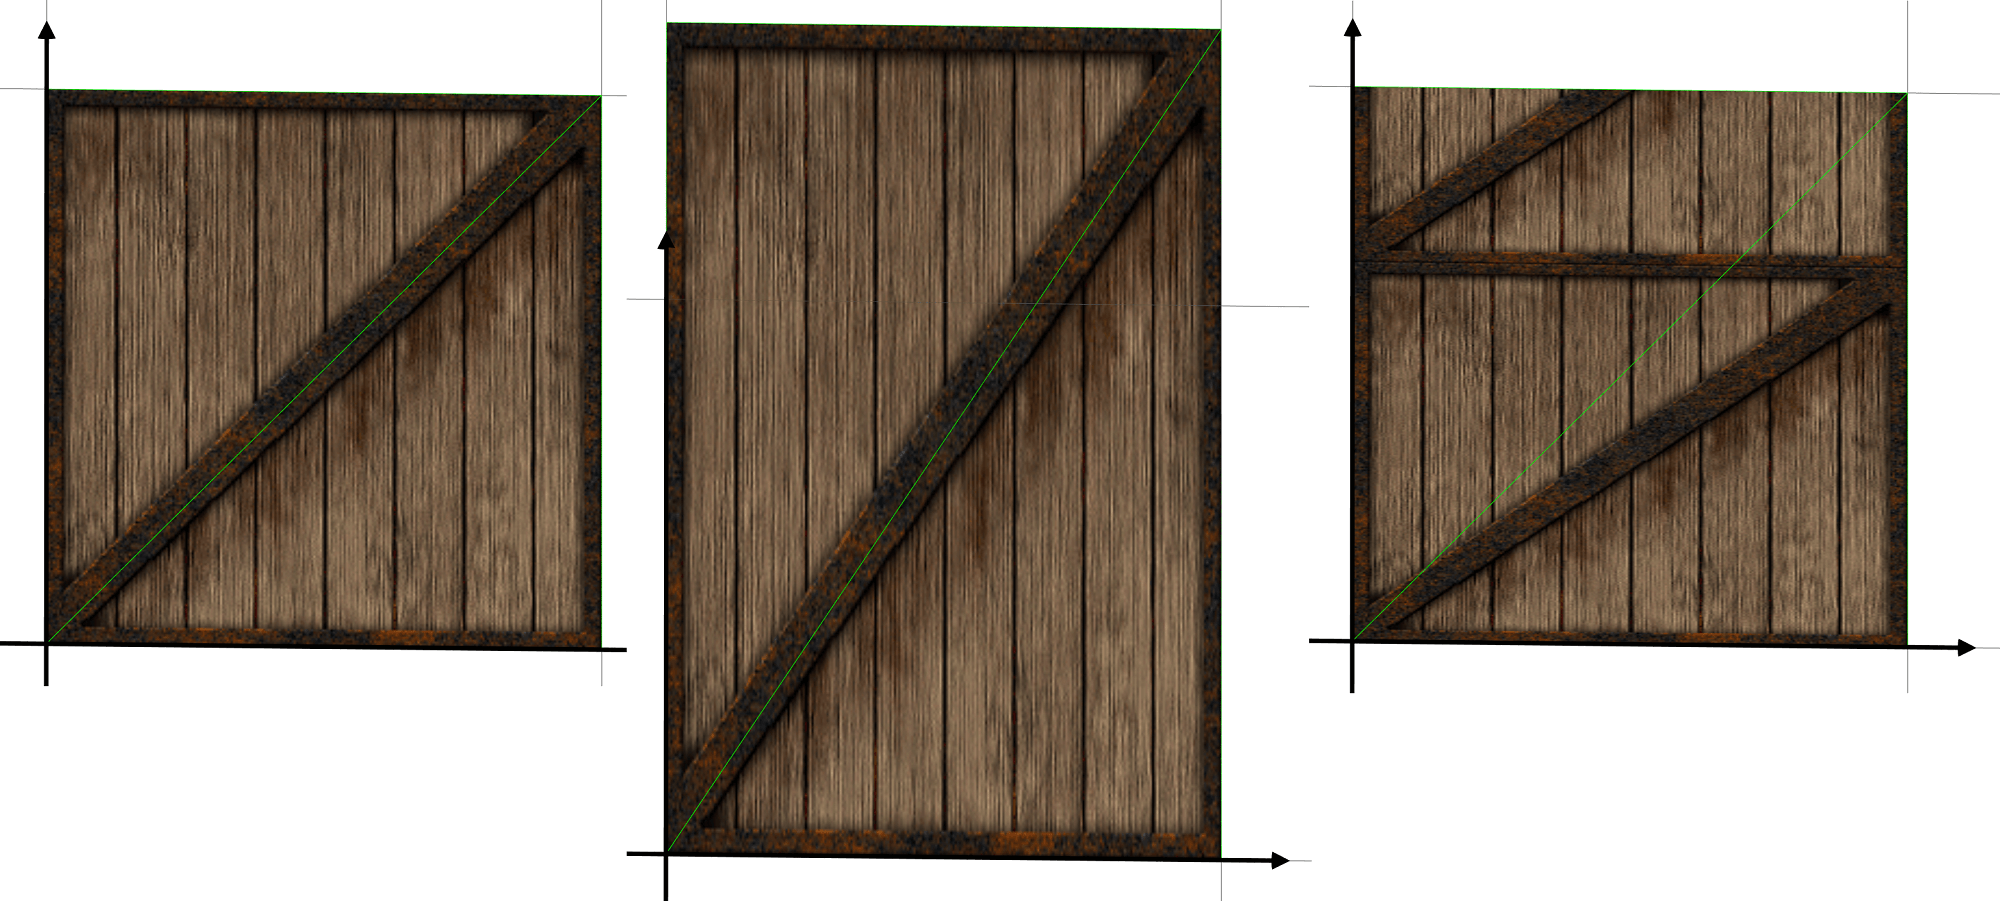
From left-to-right, we have the texture's u,v coordinates mapped directly to the corner vertices' x,y coordinates. Then the top vertices have had their y coordinates increased, but as the texture is still directly mapped to them, the texture gets stretched upwards. In the far right image, it's the texture that's altered this time: the u values have been raised but this results in the texture becoming squashed and then repeated.
This is because although the texture is now effectively taller, thanks to the higher u value, it still has to fit into the primitive -- essentially the texture has been partially repeated. This is one way of doing something that's seen in lots of 3D games: texture repeating. Common examples of this can be found in scenes with rocky or grassy landscapes, or brick walls.
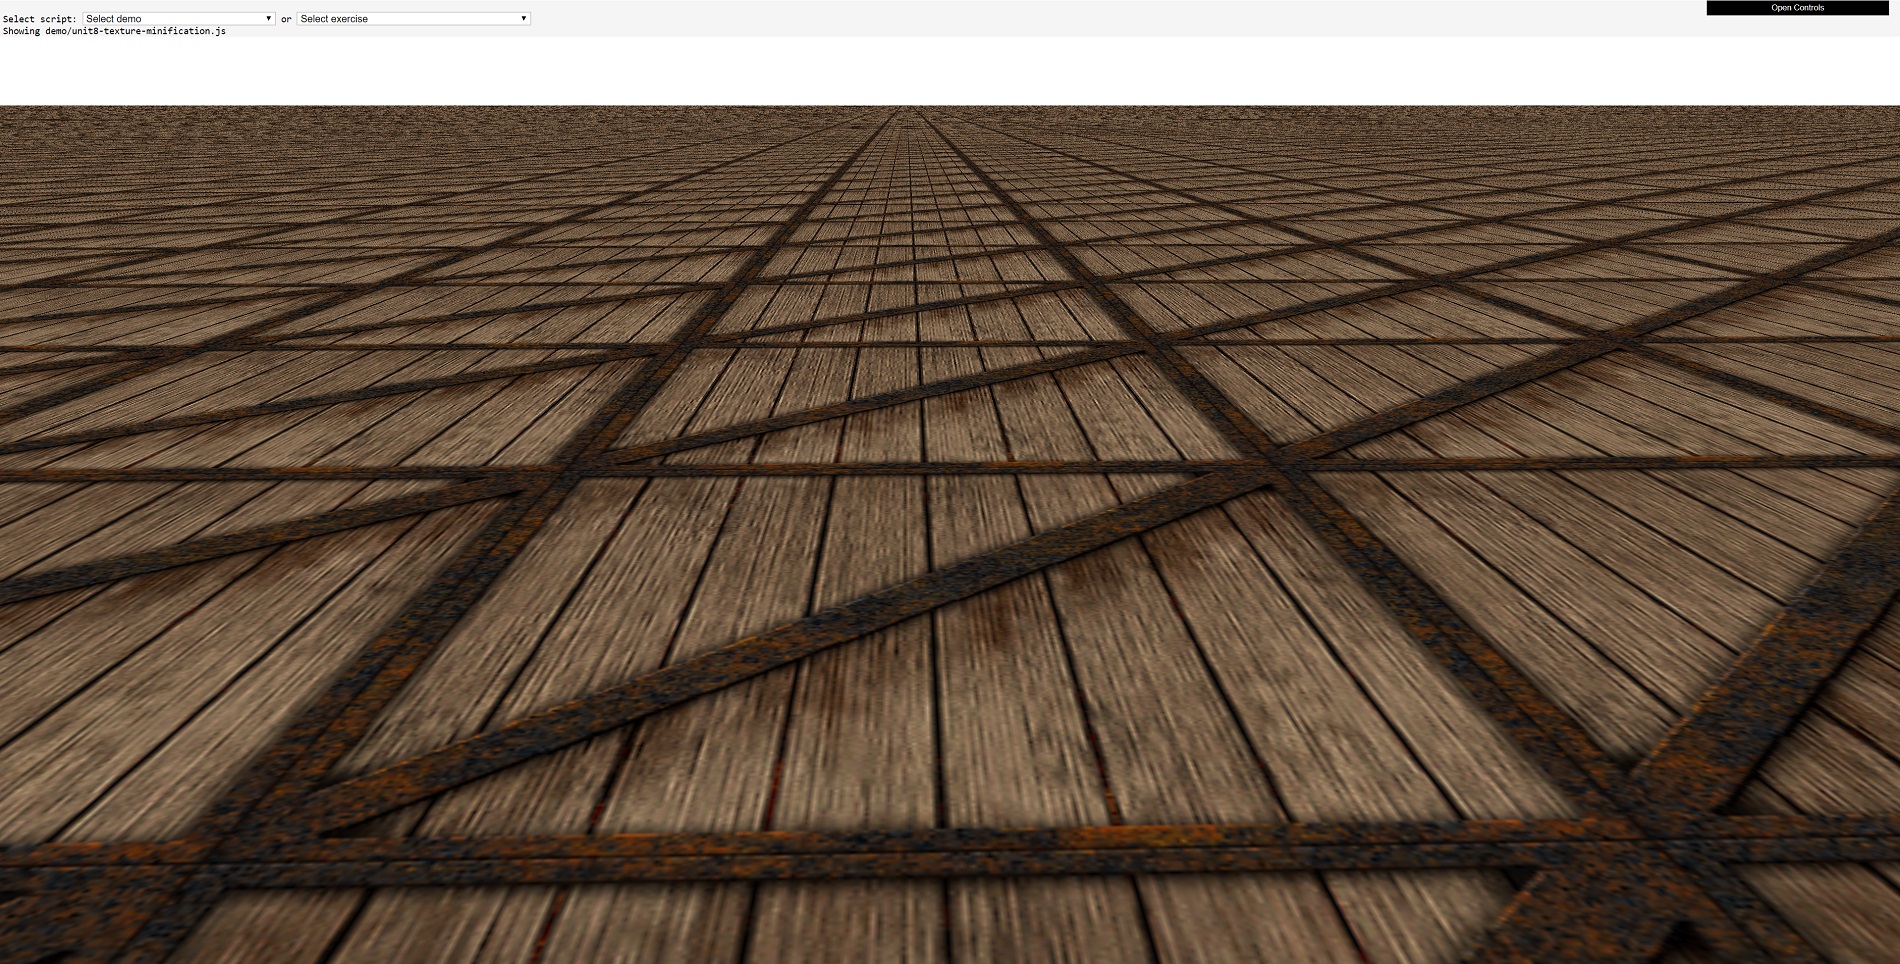
Now let's adjust the scene so that there are more primitives, and we'll also bring depth back into play. What we have below is a classic landscape view, but with the crate texture copied, as well as repeated, across the primitives.

Now that crate texture, in its original gif format, is 66 kiB in size and has a resolution of 256 x 256 pixels. The original resolution of the portion of the frame that the crate textures cover is 1900 x 680, so in terms of just pixel 'area' that region should only be able to display 20 crate textures.
We're obviously looking at way more than 20, so it must mean that a lot of the crate textures in the background must be much smaller than 256 x 256 pixels. Indeed they are, and they've undergone a process called texture minification (yes, that is a word!). Now let's try it again, but this time zoomed right into one of the crates.

Don't forget that the texture is just 256 x 256 pixels in size, but here we can see one texture being more than half the width of the 1900 pixels wide image. This texture has gone through something called texture magnification.
These two texture processes occur in 3D games all the time, because as the camera moves about the scene or models move closer and further away, all of the textures applied to the primitives need to be scaled along with the polygons. Mathematically, this isn't a big deal, in fact, it's so simple that even the most basic of integrated graphics chips blitz through such work. However, texture minification and magnification present fresh problems that have to be resolved somehow.
Enter the mini-me of textures
The first issue to be fixed is for textures in the distance. If we look back at that first crate landscape image, the ones right at the horizon are effectively only a few pixels in size. So trying to squash a 256 x 256 pixel image into such a small space is pointless for two reasons.
One, a smaller texture will take up less memory space in a graphics card, which is handy for trying to fit into a small amount of cache. That means it is less likely to removed from the cache and so repeated use of that texture will gain the full performance benefit of data being in nearby memory. The second reason we'll come to in a moment, as it's tied to the same problem for textures zoomed in.
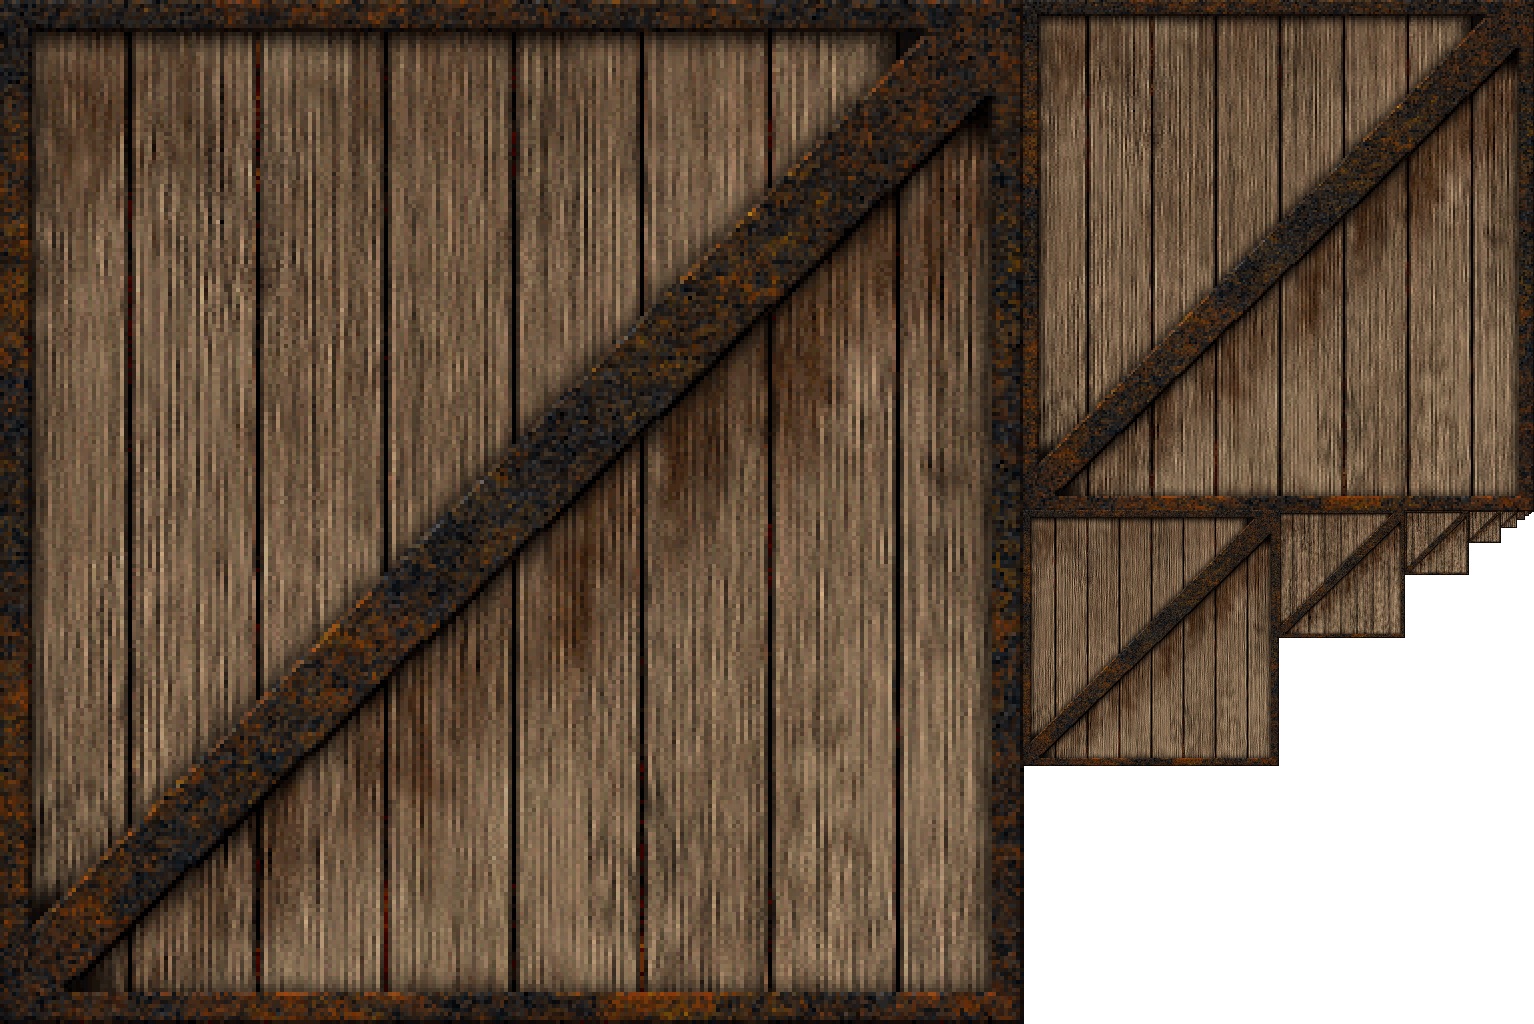
A common solution to the use of big textures being squashed into tiny primitives involves the use of mipmaps. These are scaled down versions of the original texture; they can be generated the game engine itself (by using the relevant API command to make them) or pre-made by the game designers. Each level of mipmap texture has half the linear dimensions of the previous one.
So for the crate texture, it goes something like this: 256 x 256 → 128 x 128 → 64 x 64 → 32 x 32 → 16 x 16 → 8 x 8 → 4 x 4 → 2 x 2 → 1 x 1.

The mipmaps are all packed together, so that the texture is still the same filename but is now larger. The texture is packed in such a way that the u,v coordinates not only determine which texel gets applied to a pixel in the frame, but also from which mipmap. The programmers then code the renderer to determine the mipmap to be used based on the depth value of the frame pixel, i.e. if it is very high, then the pixel is in the far distance, so a tiny mipmap can be used.
Sharp eyed readers might have spotted a downside to mipmaps, though, and it comes at the cost of the textures being larger. The original crate texture is 256 x 256 pixels in size, but as you can see in the above image, the texture with mipmaps is now 384 x 256. Yes, there's lots of empty space, but no matter how you pack in the smaller textures, the overall increase to at least one of the texture's dimensions is 50%.
But this is only true for pre-made mipmaps; if the game engine is programmed to generate them as required, then the increase is never more than 33% than the original texture size. So for a relatively small increase in memory for the texture mipmaps, you're gaining performance benefits and visual improvements.
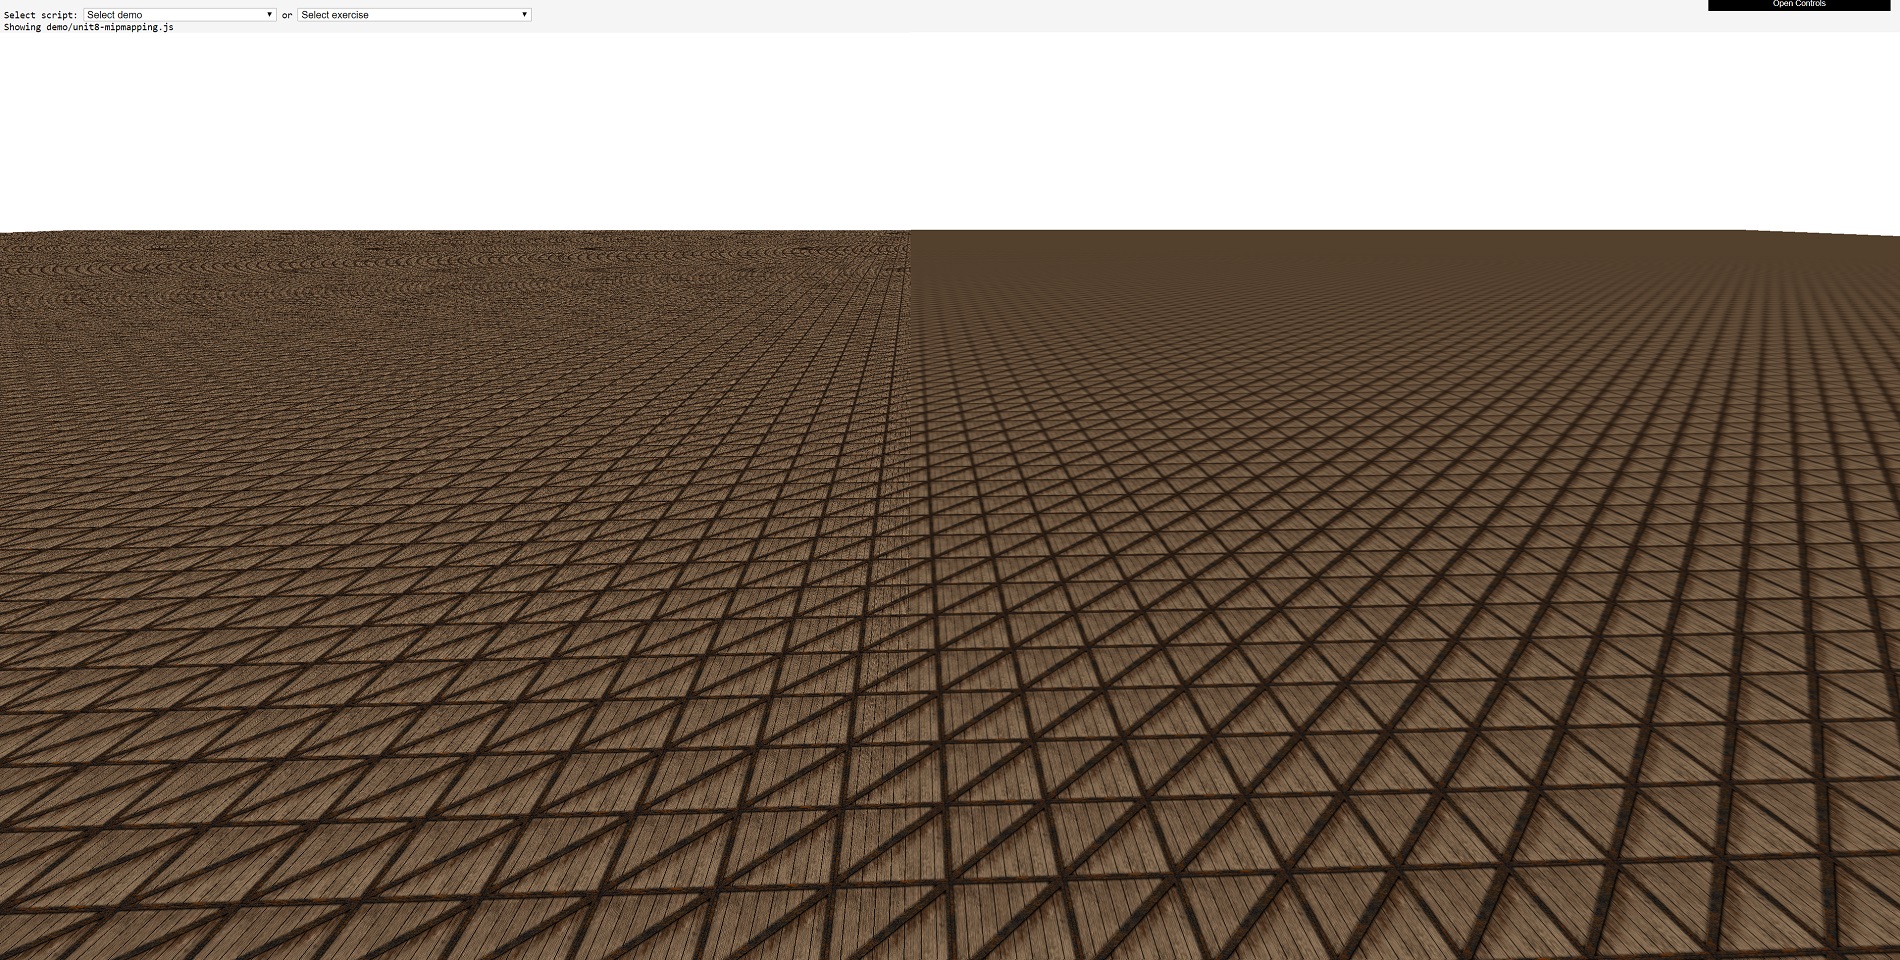
Below is is an off/on comparison of texture mipmaps:

On the left hand side of the image, the crate textures are being used 'as is', resulting in a grainy appearance and so-called moiré patterns in the distance. Whereas on the right hand side, the use of mipmaps results in a much smoother transition across the landscape, where the crate texture blurs into a consistent color at the horizon.
The thing is, though, who wants blurry textures spoiling the background of their favorite game?
Bilinear, trilinear, anisotropic - it's all Greek to me
The process of selecting a pixel from a texture, to be applied to a pixel in a frame, is called texture sampling, and in a perfect world, there would be a texture that exactly fits the primitive it's for -- regardless of its size, position, direction, and so on. In other words, texture sampling would be nothing more than a straight 1-to-1 texel-to-pixel mapping process.
Since that isn't the case, texture sampling has to account for a number of factors:
Has the texture been magnified or minified? Is the texture original or a mipmap? What angle is the texture being displayed at? Let's analyze these one at a time. The first one is obvious enough: if the texture has been magnified, then there will be more texels covering the pixel in the primitive than required; with minification it will be the other way around, each texel now has to cover more than one pixel. That's a bit of a problem.
The second one isn't though, as mipmaps are used to get around the texture sampling issue with primitives in the distance, so that just leaves textures at an angle. And yes, that's a problem too. Why? Because all textures are images generated for a view 'face on', or to be all math-like: the normal of a texture surface is the same as the normal of the surface that the texture is currently displayed on.
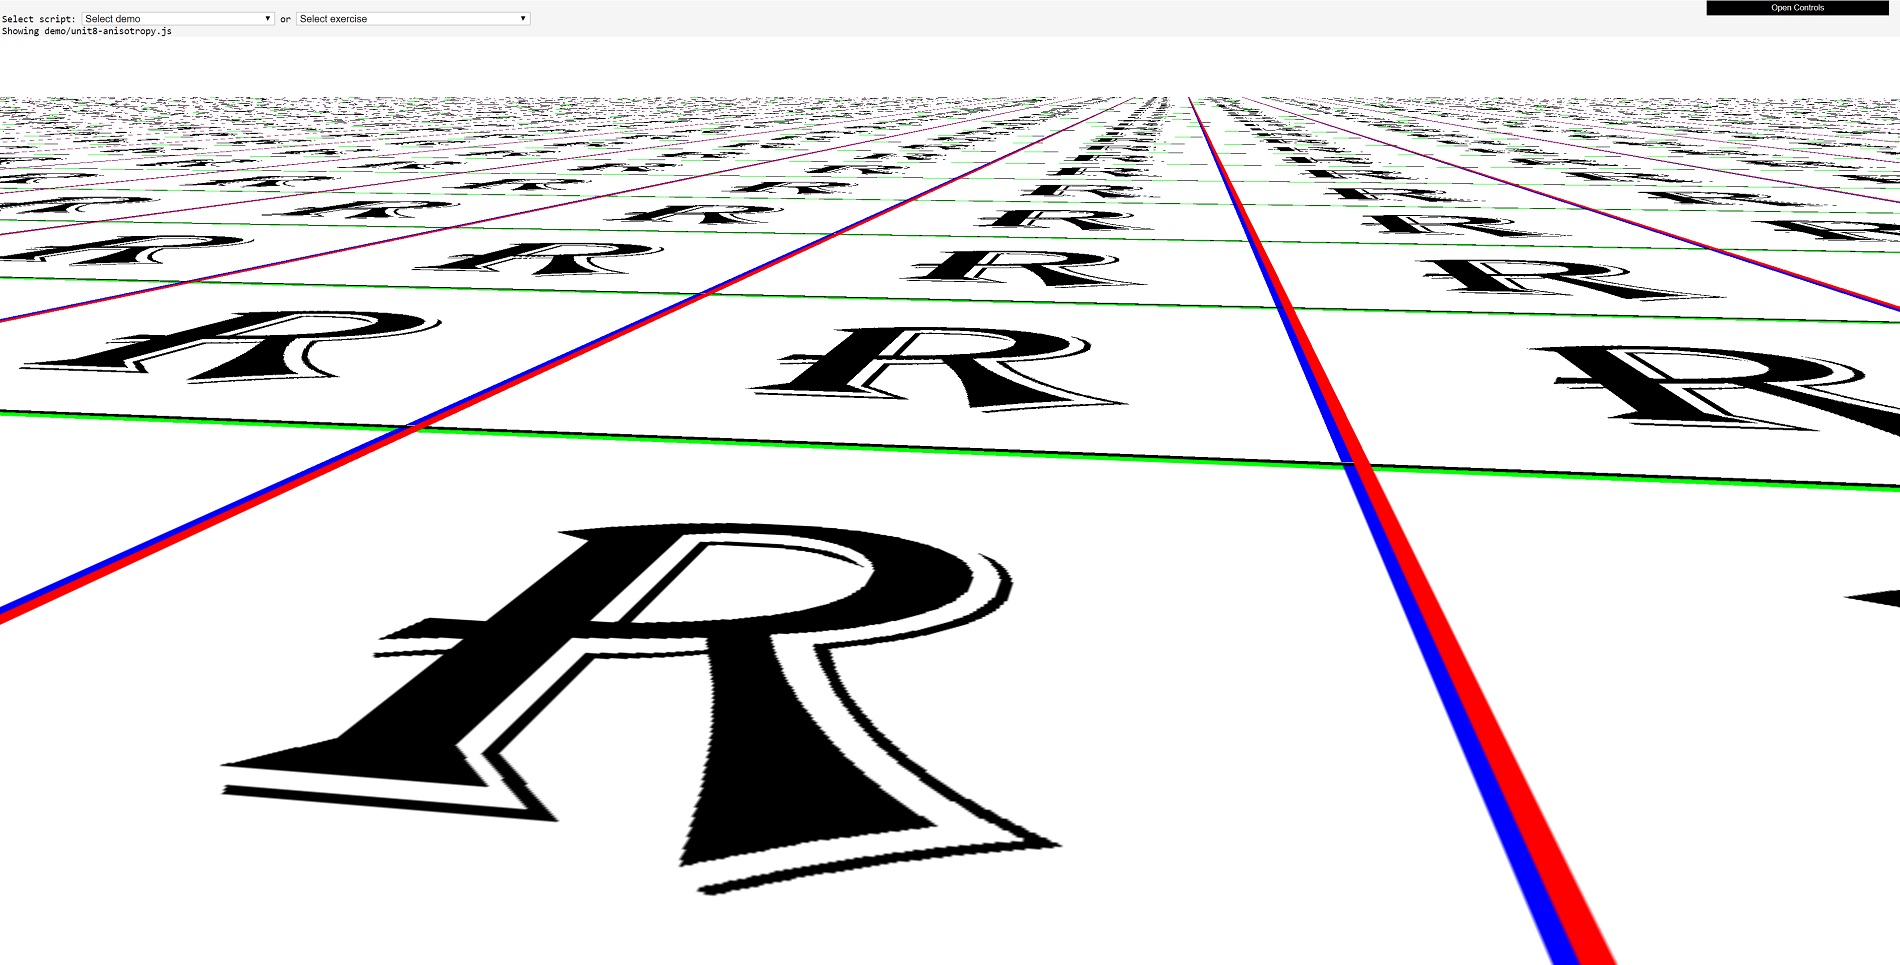
So having too few or too many texels, and having texels at an angle, require an additional process called texture filtering. If you don't use this process, then this is what you get:

Here we've replaced the crate texture with a letter R texture, to show more clearly how much of a mess it can get without texture filtering!
Graphics APIs such as Direct3D, OpenGL, and Vulkan all offer the same range filtering types but use different names for them. Essentially, though, they all go like this:
Nearest point sampling Linear texture filtering Anisotropic texture filtering To all intents and purposes, nearest point sampling isn't filtering - this is because all that happens is the nearest texel to the pixel requiring the texture is sampled (i.e. copied from memory) and then blended with the pixel's original color.
Here comes linear filtering to the rescue. The required u,v coordinates for the texel are sent off to the hardware for sampling, but instead of taking the very nearest texel to those coordinates, the sampler takes four texels. These are directly above, below, left, and right of the one selected by using nearest point sampling.
These 4 texels are then blended together using a weighted formula. In Vulkan, for example, the formula is:

The T refers to texel color, where f is for the filtered one and 1 through to 4 are the four sampled texels. The values for alpha and beta come from how far away the point defined by the u,v coordinates is from the middle of the texture.
Fortunately for everyone involved in 3D games, whether playing them or making them, this happens automatically in the graphics processing chip. In fact, this is what the TMU chip in the 3dfx Voodoo did: sampled 4 texels and then blended them together. Direct3D oddly calls this bilinear filtering, but since the time of Quake and the Voodoo's TMU chip, graphics cards have been able to do bilinear filtering in just one clock cycle (provided the texture is sitting handily in nearby memory, of course).
Linear filtering can be used alongside mipmaps, and if you want to get really fancy with your filtering, you can take 4 texels from a texture, then another 4 from the next level of mipmap, and then blend all that lot together. And Direct3D's name for this? Trilinear filtering. What's tri about this process? Your guess is as good as ours...
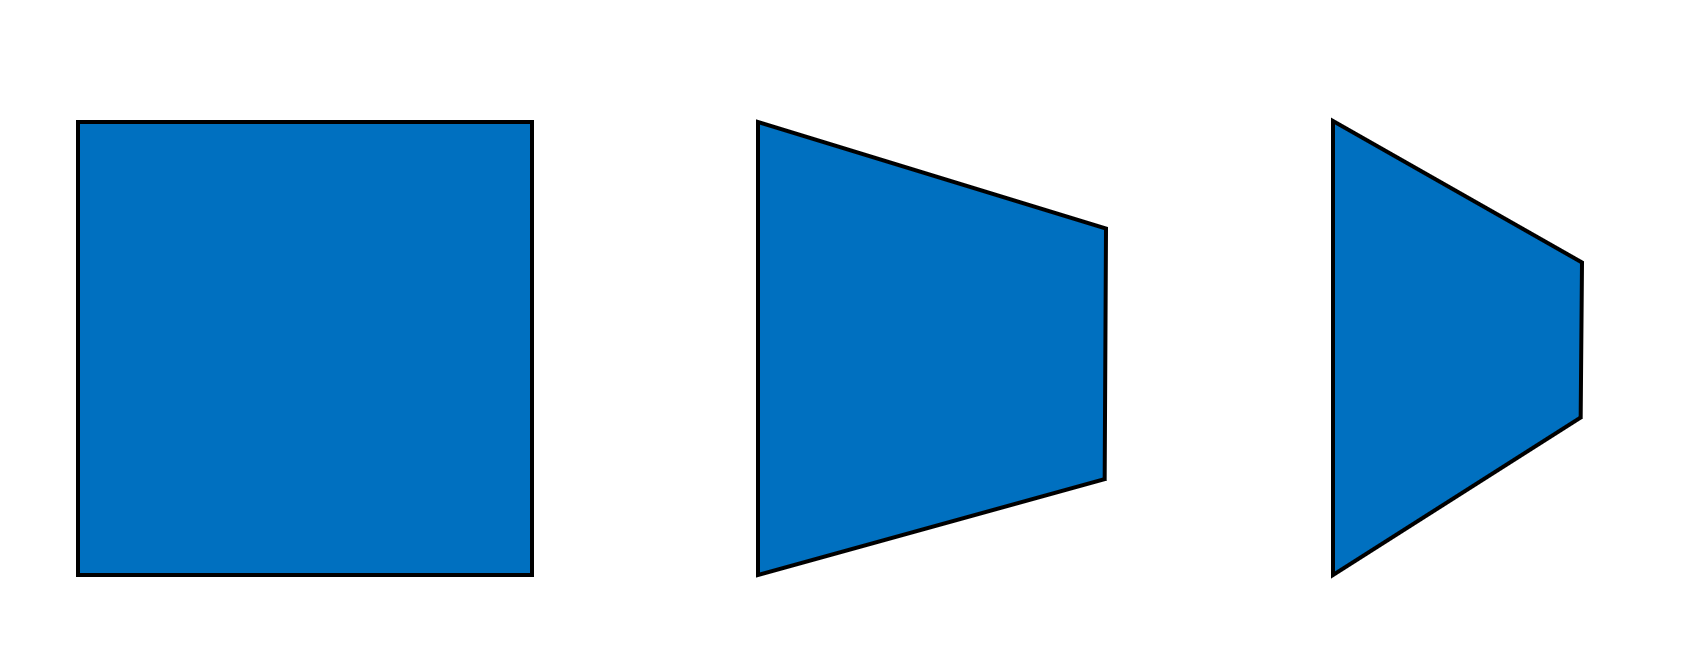
The last filtering method to mention is called anisotropic. This is actually an adjustment to the process done in bilinear or trilinear filtering. It initially involves a calculation of the degree of anisotropy of the primitive's surface (and it's surprisingly complex, too) -- this value increases the primitive's aspect ratio alters due to its orientation:

The above image shows the same square primitive, with equal length sides; but as it rotates away from our perspective, the square appears to become a rectangle, and its width increases over its height. So the primitive on the right has a larger degree of anisotropy than those left of it (and in the case of the square, the degree is exactly zero).
Many of today's 3D games allow you to enable anisotropic filtering and then adjust the level of it (1x through to 16x), but what does that actually change? The setting controls the maximum number of additional texel samples that are taken per original linear sampling. For example, let's say the game is set to use 8x anisotropic bilinear filtering. This means that instead of just fetching 4 texels values, it will fetch 32 values.
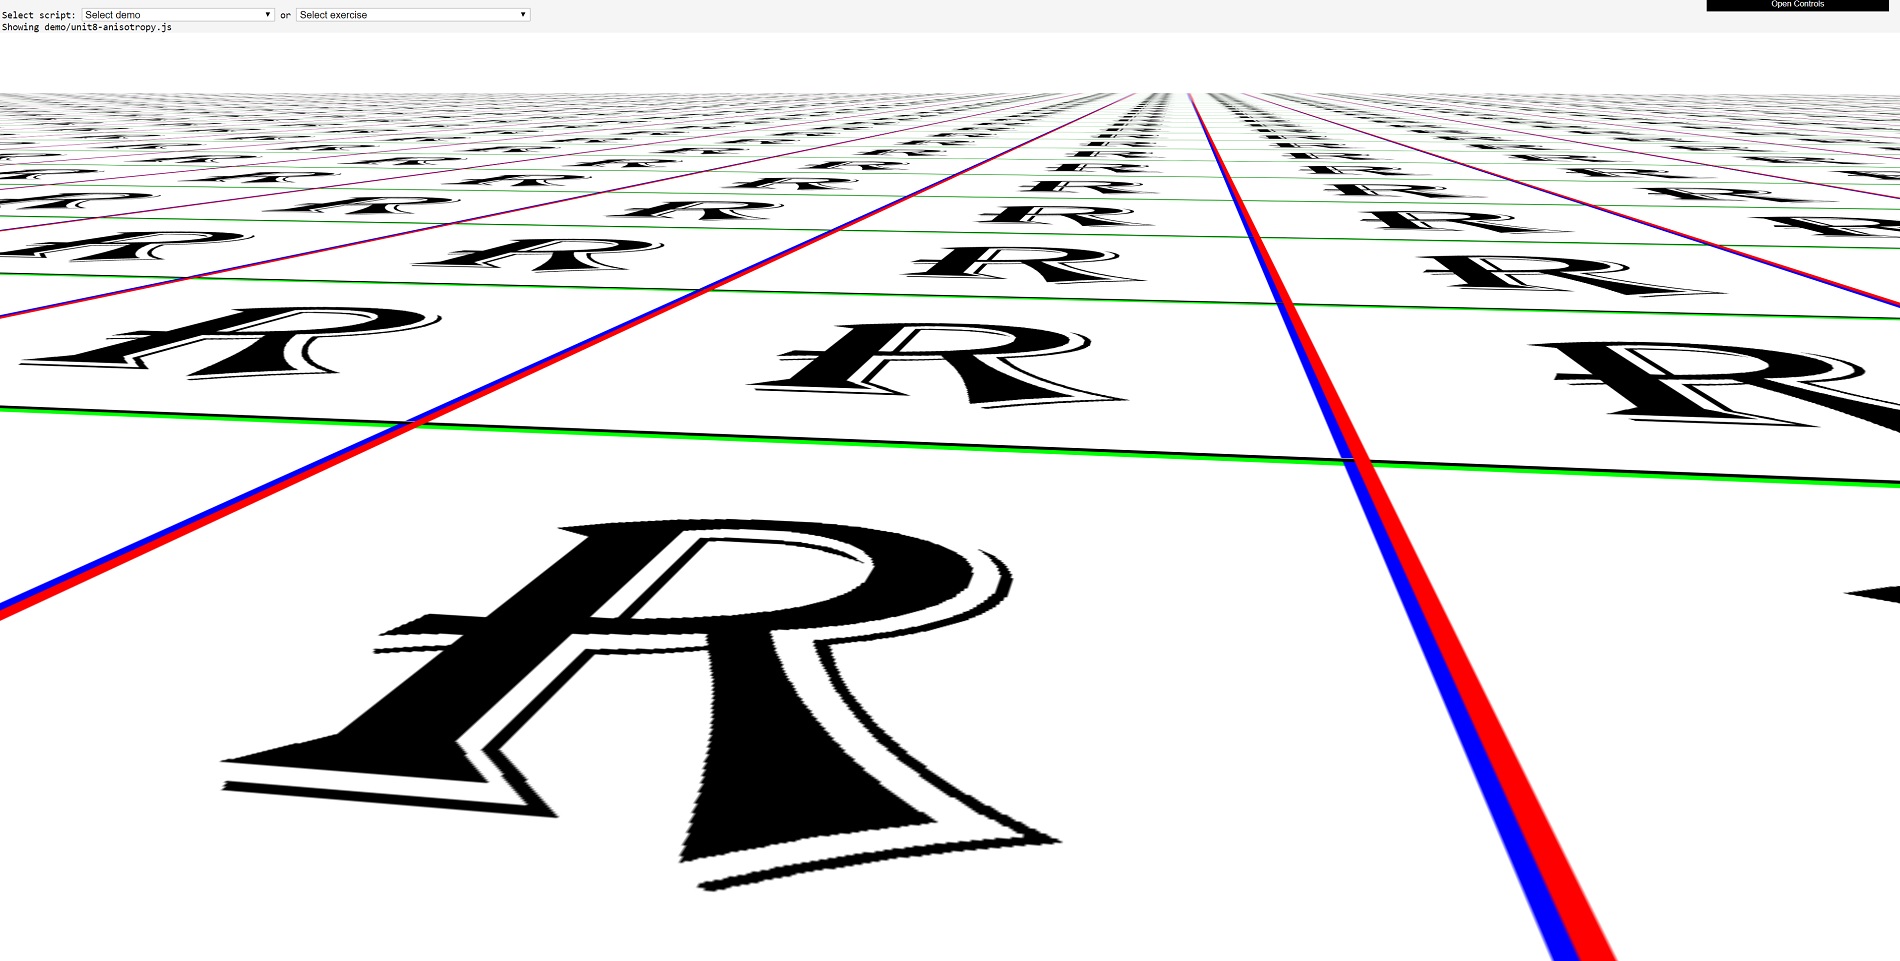
The difference the use of anisotropic filtering can make is clear to see:

Just scroll back up a little and compare nearest point sampling to maxed out 16x anisotropic trilinear filtering. So smooth, it's almost delicious!
But there must be a price to pay for all this lovely buttery texture deliciousness and it's surely performance: all maxed out, anisotropic trilinear filtering will be fetching 128 samples from a texture, for each pixel being rendered. For even the very best of the latest GPUs, that just can't be done in a single clock cycle.
If we take something like AMD's Radeon RX 5700 XT, each one of the texturing units inside the processor can fire off 32 texel addresses in one clock cycle, then load 32 texel values from memory (each 32 bits in size) in another clock cycle, and then blend 4 of them together in one more tick. So, for 128 texel samples blended into one, that requires at least 16 clock cycles.

AMD's 7nm RDNA Radeon RX 5700 GPU
Now the base clock rate of a 5700 XT is 1605 MHz, so sixteen cycles takes a mere 10 nanoseconds. Doing this for every pixel in a 4K frame, using just one texture unit, would still only take 70 milliseconds. Okay, so perhaps performance isn't that much of an issue!
Even back in 1996, the likes of the 3Dfx Voodoo were pretty nifty when it came to handling textures. It could max out at 1 bilinear filtered texel per clock cycle, and with the TMU chip rocking along at 50 MHz, that meant 50 million texels could be churned out, every second. A game running at 800 x 600 and 30 fps, would only need 14 million bilinear filtered texels per second.
However, this all assumes that the textures are in nearby memory and that only one texel is mapped to each pixel. Twenty years ago, the idea of needing to apply multiple textures to a primitive was almost completely alien, but it's commonplace now. Let's have a look at why this change came about.
Lighting the way to spectacular images
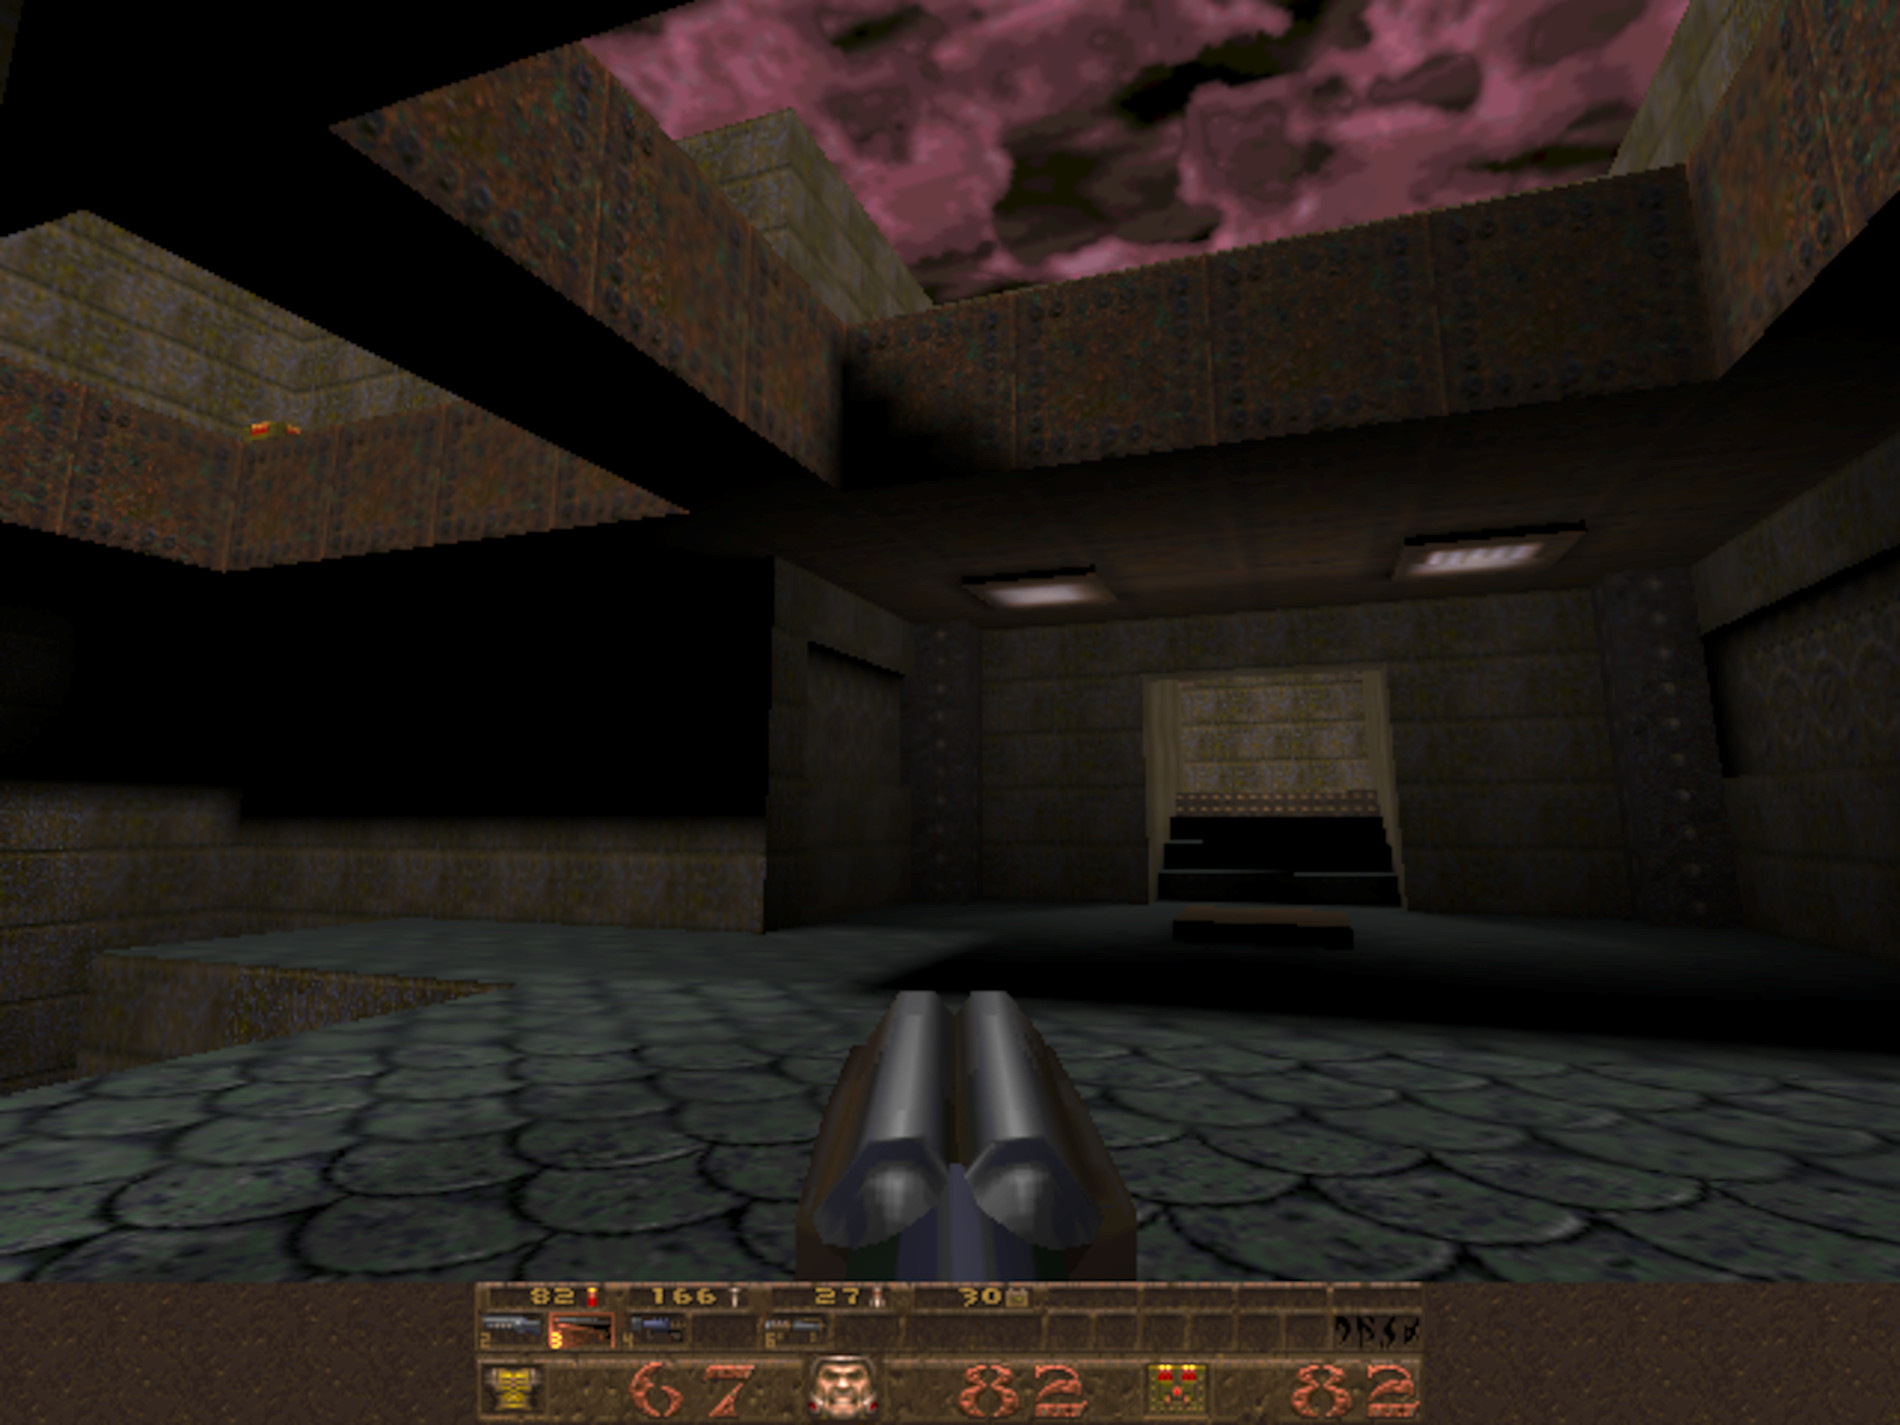
To help understand how texturing became so important, take a look at this scene from Quake:

It's a dark image, that was the nature of the game, but you can see that the darkness isn't the same everywhere - patches of the walls and floor are brighter than others, to give a sense of the overall lighting in that area.
The primitives making up the sides and ground all have the same texture applied to them, but there is a second one, called a light map, that is blended with the texel values before they're mapped to the frame pixels. In the days of Quake, light maps were pre-calculated and made by the game engine, and used to generate static and dynamic light levels.
The advantage of using them was that complex lighting calculations were done to the textures, rather than the vertices, notably improving the appearance of a scene and for very little performance cost. It's obviously not perfect: as you can see on the floor, the boundary between the lit areas and those in shadow is very stark.
In many ways, a light map is just another texture (remember that they're all nothing more than 2D data arrays), so what we're looking at here is an early use of what became known as multitexturing. As the name clearly suggests, it's a process where two or more textures are applied to a primitive. The use of light maps in Quake was a solution to overcome the limitations of Gouraud shading, but as the capabilities of graphics cards grew, so did the applications of multitexturing.
The 3Dfx Voodoo, like other cards of its era, was limited by how much it could do in one rendering pass. This is essentially a complete rendering sequence: from processing the vertices, to rasterizing the frame, and then modifying the pixels into a final frame buffer. Twenty years ago, games performed single pass rendering pretty much all of the time.

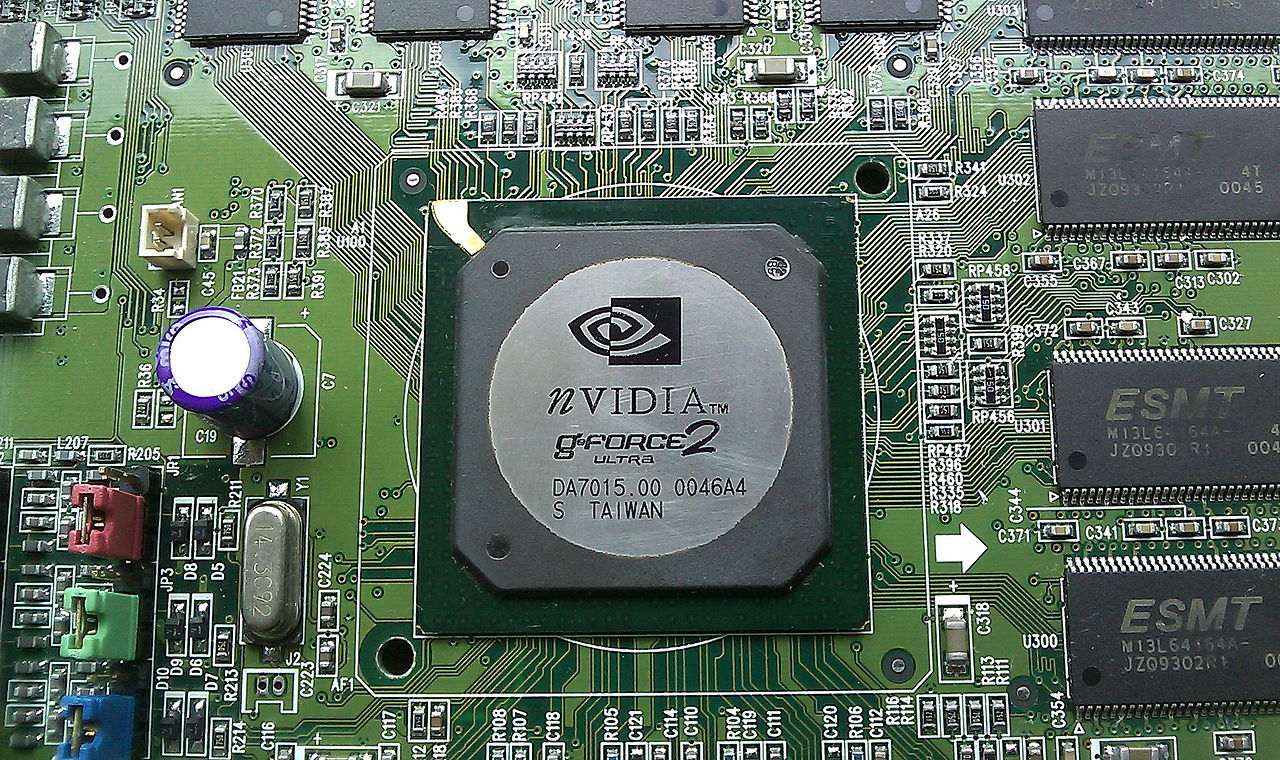
Nvidia's GeForce 2 Ultra, circa late 2000. Image: Wikimedia
This is because processing the vertices twice, just because you wanted to apply some more textures, was too costly in terms of performance. We had to wait a couple of years after the Voodoo, until the ATI Radeon and Nvidia GeForce 2 graphics cards were available before we could do multitexturing in one rendering pass.
These GPUs had more than one texture unit per pixel processing section (aka, a pipeline), so fetching a bilinear filtered texel from two separate textures was a cinch. That made light mapping even more popular, allowing for games to make them fully dynamic, altering the light values based on changes in the game's environment.
But there is so much more that can be done with multiple textures, so let's take a look.
It's normal to bump up the height
In this series of articles on 3D rendering, we've not addressed how the role of the GPU really fits into the whole shebang (we will do, just not yet!). But if you go back to Part 1, and look at all of the complex work involved in vertex processing, you may think that this is the hardest part of the whole sequence for the graphics processor to handle.
For a long time it was, and game programmers did everything they could to reduce this workload. That meant reaching into the bag of visual tricks and pulling off as many shortcuts and cheats as possible, to give the same visual appearance of using lots of vertices all over the place, but not actually use that many to begin with.
And most of these tricks involved using textures called height maps and normal maps. The two are related in that the latter can be created from the former, but for now, let's just take a look at a technique called bump mapping.

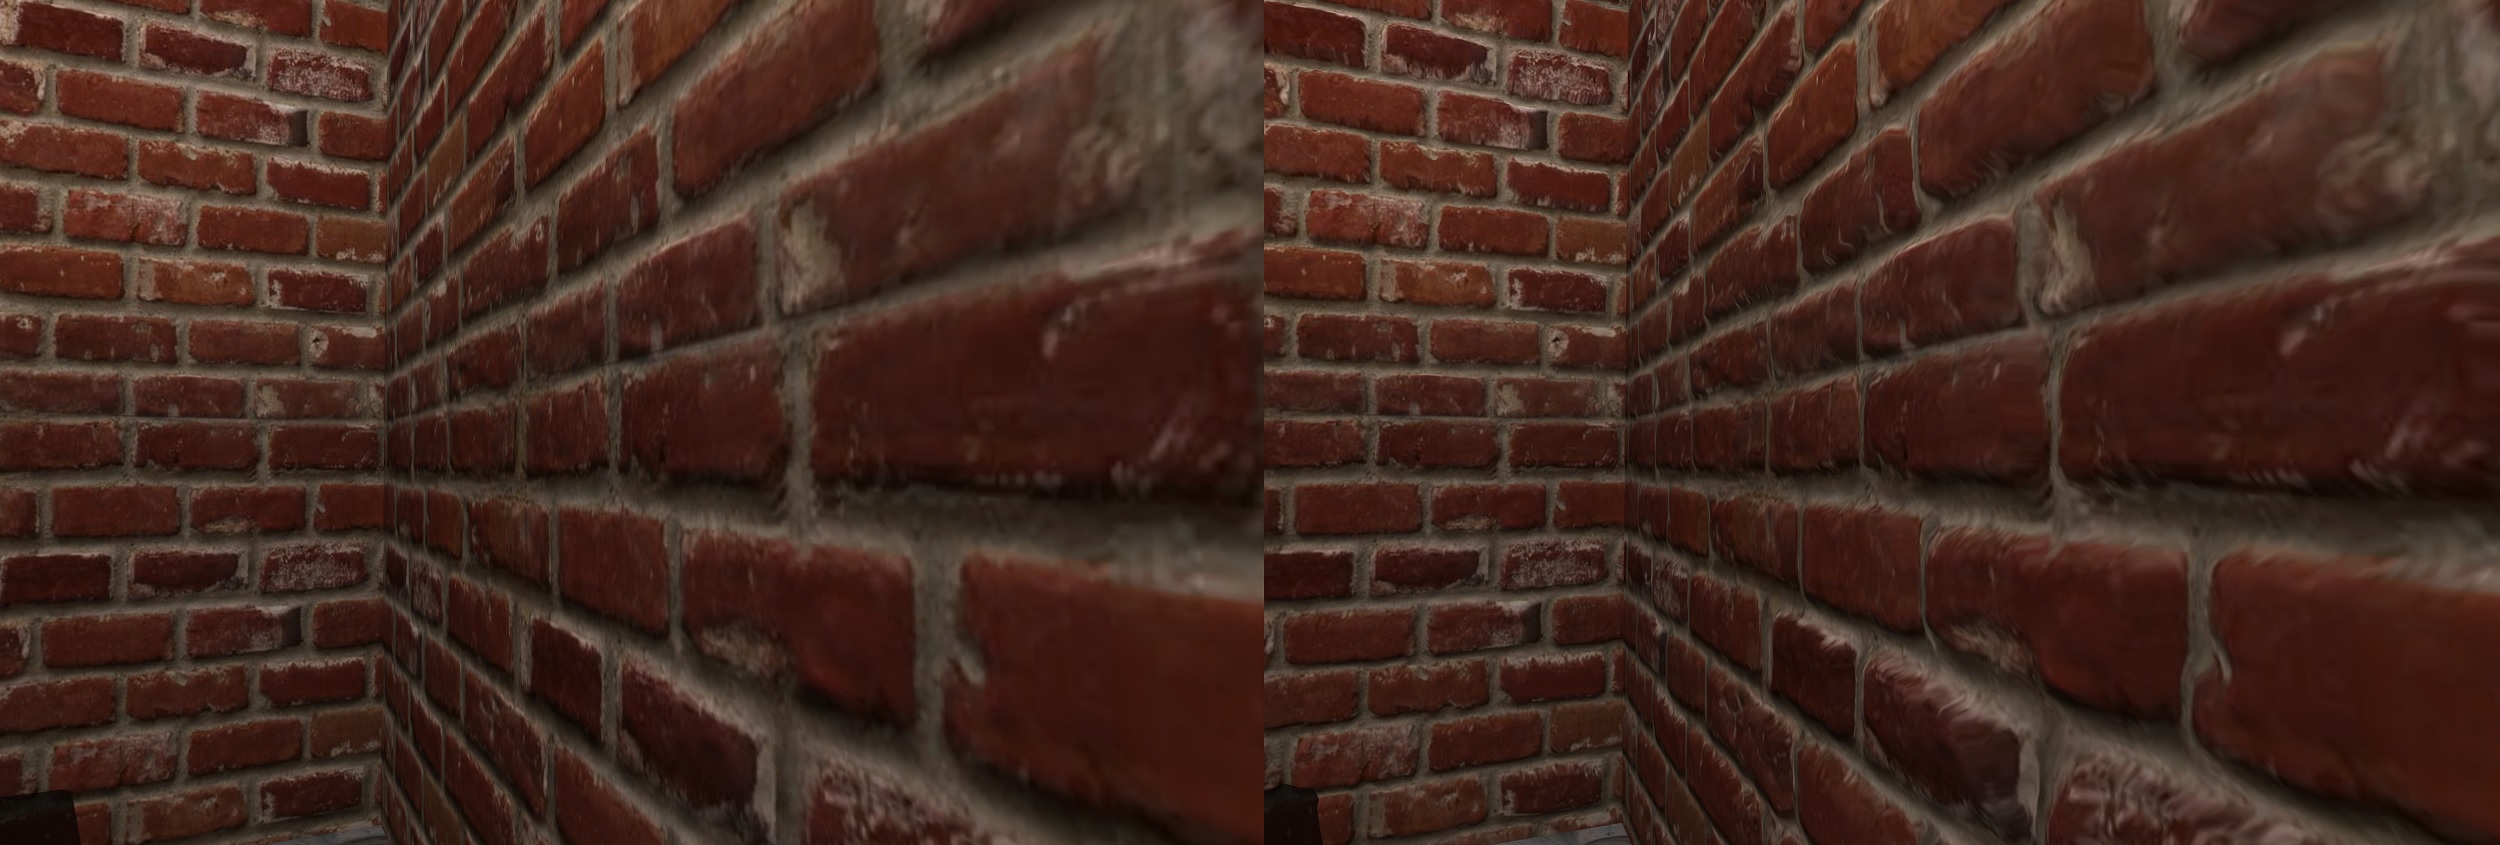
Images created using a rendering demo by Emil Persson. Left / Right: Off / On bump mapping
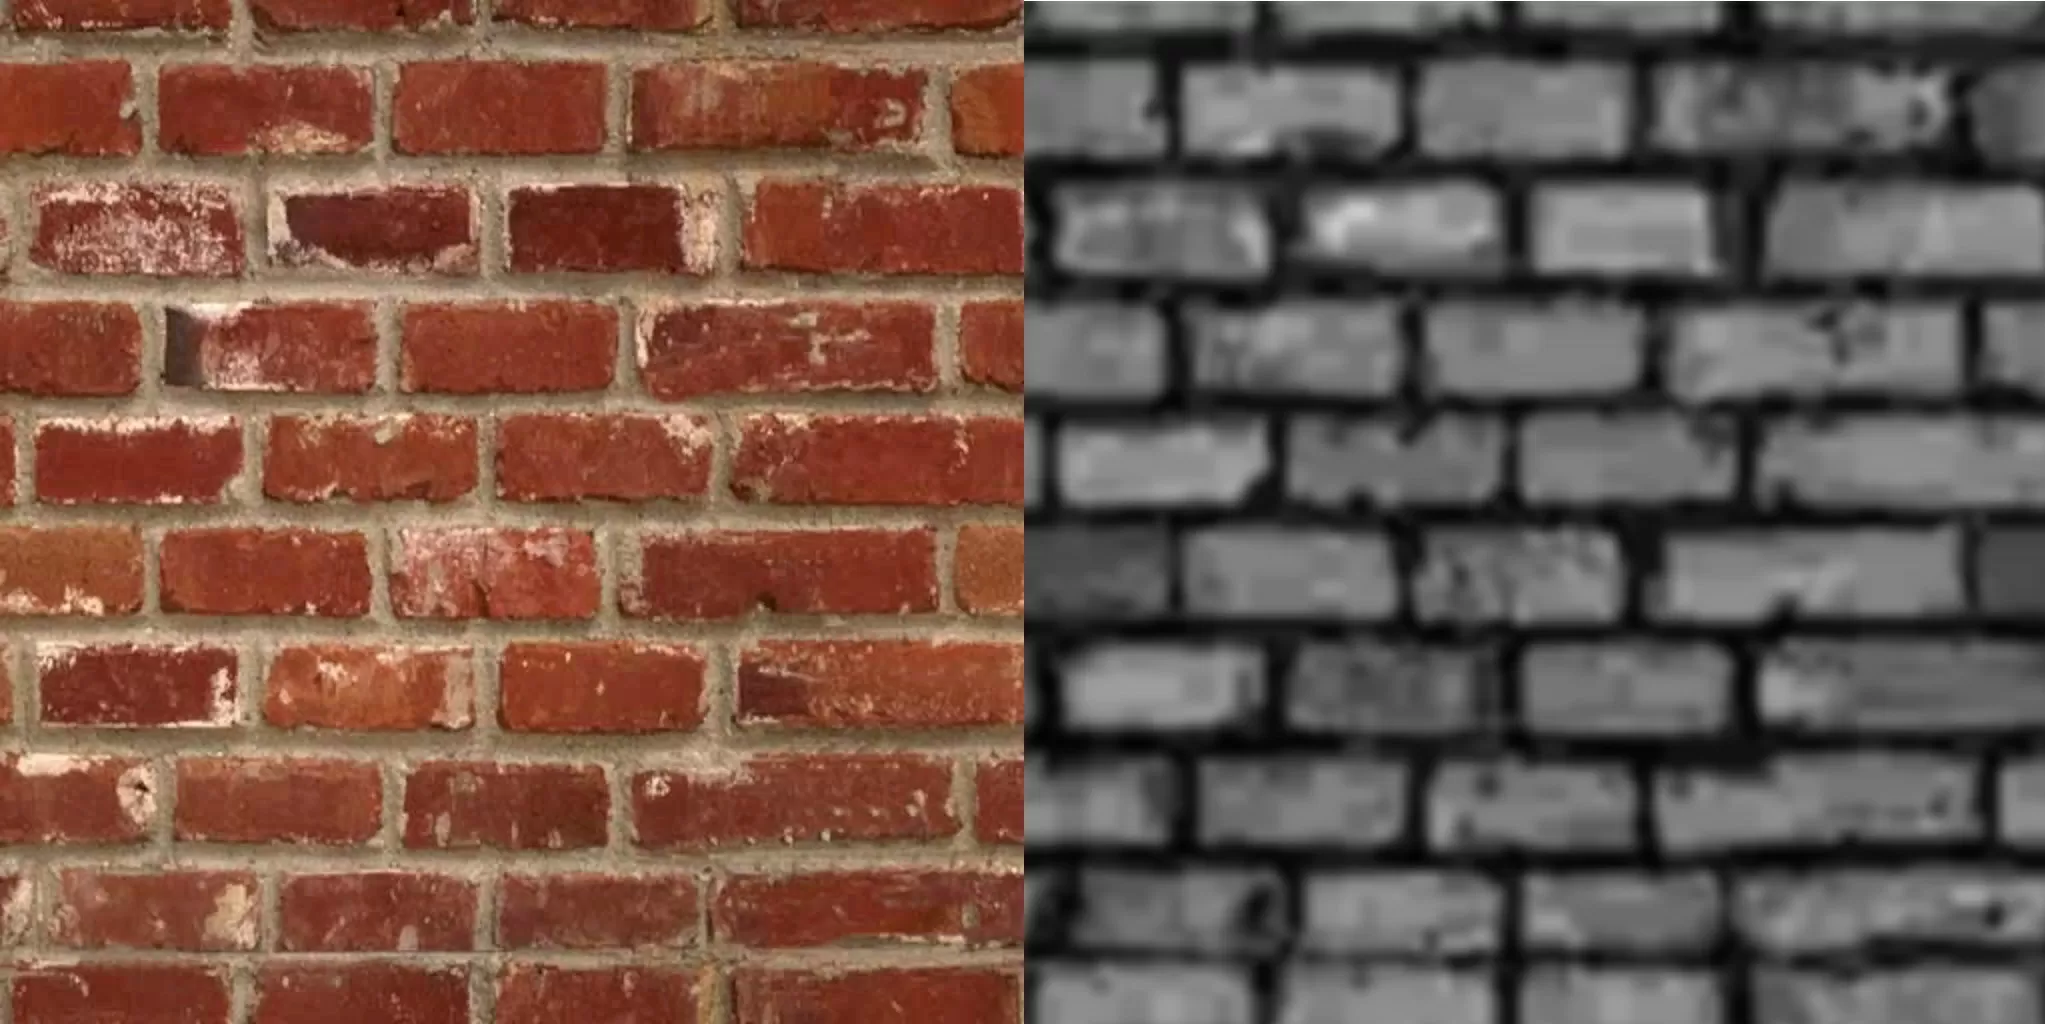
Bump mapping involves using a 2D array called a height map, that looks like an odd version of the original texture. For example, in the above image, there is a realistic brick texture applied to 2 flat surfaces. The texture and its height map look like this:

The colors of the height map represent the normals of the brick's surface (we covered what a normal is in Part 1 of this series of articles). When the rendering sequence reaches the point of applying the brick texture to the surface, a sequence of calculations take place to adjust the color of the brick texture based on the normal.
The result is that the bricks themselves look more 3D, even though they are still totally flat. If you look carefully, particularly at the edges of the bricks, you can see the limitations of the technique: the texture looks slightly warped. But for a quick trick of adding more detail to a surface, bump mapping is very popular.
A normal map is like a height map, except the colors of that texture are the normals themselves. In other words, a calculation to convert the height map into normals isn't required. You might wonder just how can colors be used to represent an arrow pointing in space? The answer is simple: each texel has a given set of r,g,b values (red, green, blue) and those numbers directly represent the x,y,z values for the normal vector.

In the above example, the left diagram shows how the direction of the normals change across a bumpy surface. To represent these same normals in a flat texture (middle diagram), we assign a color to them. In our case, we've used r,g,b values of (0,255,0) for straight up, and then increasing amounts of red for left, and blue for right.
Note that this color isn't blended with the original pixel - it simply tells the processor what direction the normal is facing, so it can properly calculate the angles between the camera, lights and the surface to be textured.
The benefits of bump and normal mapping really shine when dynamic lighting is used in the scene, and the rendering process calculates the effects of the light changes per pixel, rather than for each vertex. Modern games now use a stack of textures to improve the quality of the magic trick being performed.

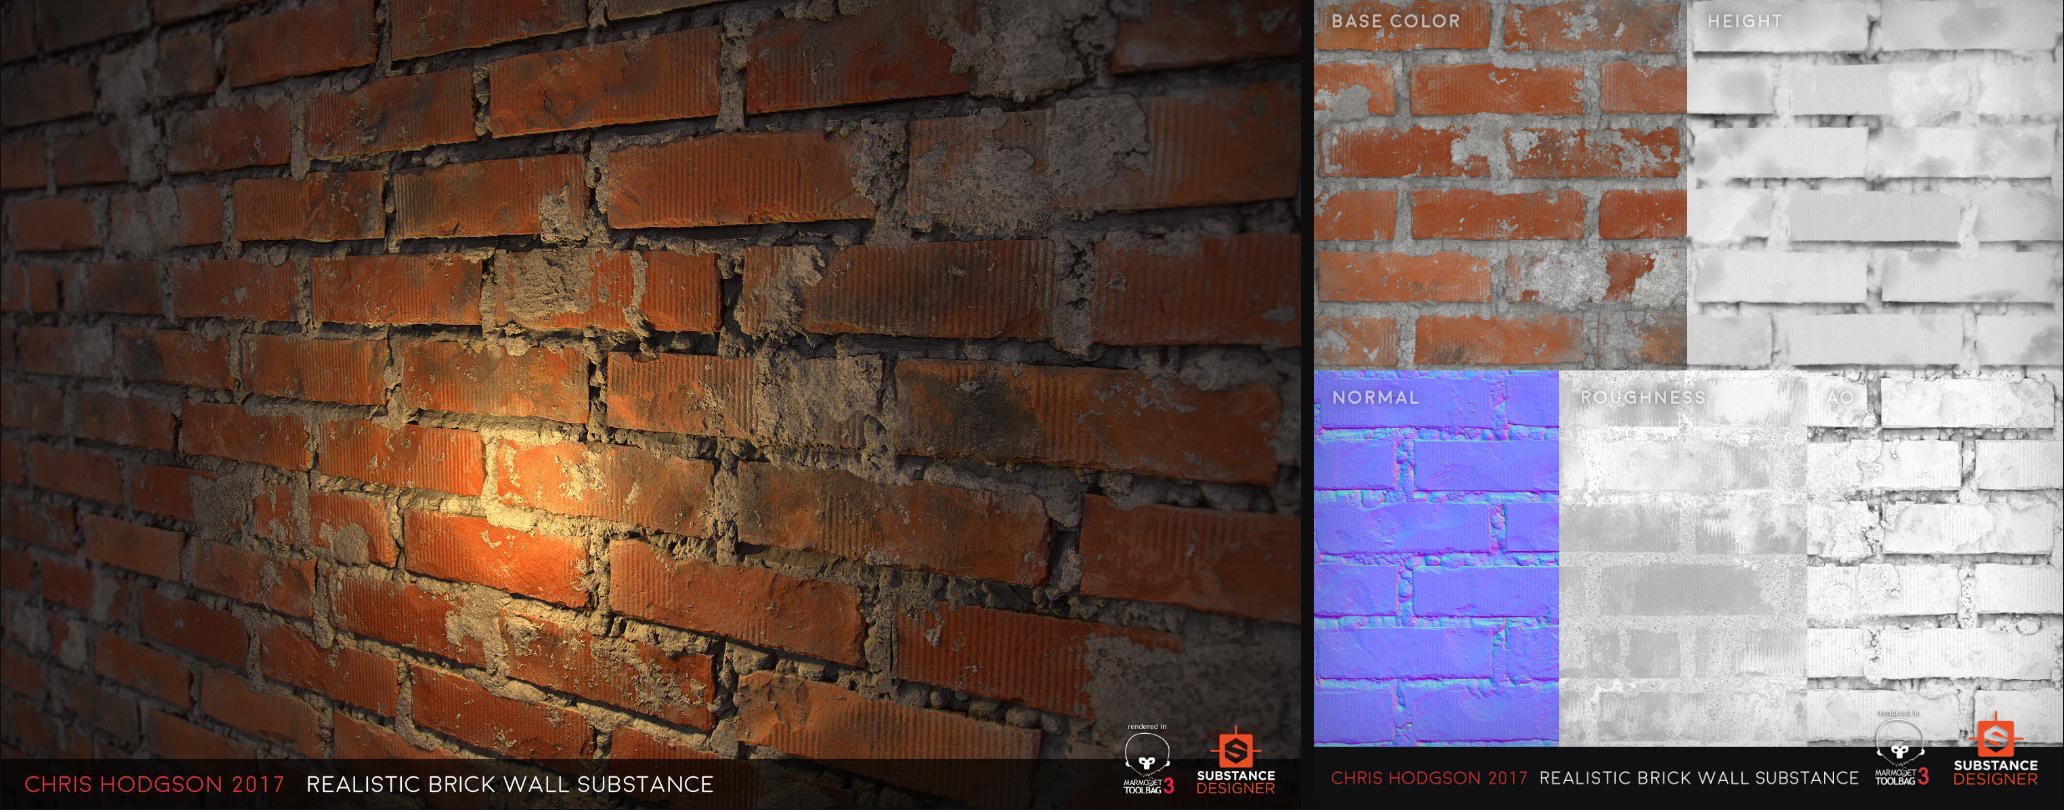
Image: Ryan Benno via Twitter
This realistic looking wall is amazingly still just a flat surface -- the details on the bricks and mortar aren't done using millions of polygons. Instead, just 5 textures and a lot of clever math gets the job done.
The height map was used to generate the way that the bricks cast shadows on themselves and the normal map to simulate all of the small changes in the surface. The roughness texture was used to change how the light reflects off the different elements of the wall (e.g. a smoothed brick reflects more consistently that rough mortar does).
The final map, labelled AO in the above image, forms part of a process called ambient occlusion: this is a technique that we'll look at in more depth in a later article, but for now, it just helps to improve the realism of the shadows.
Texture mapping is crucial
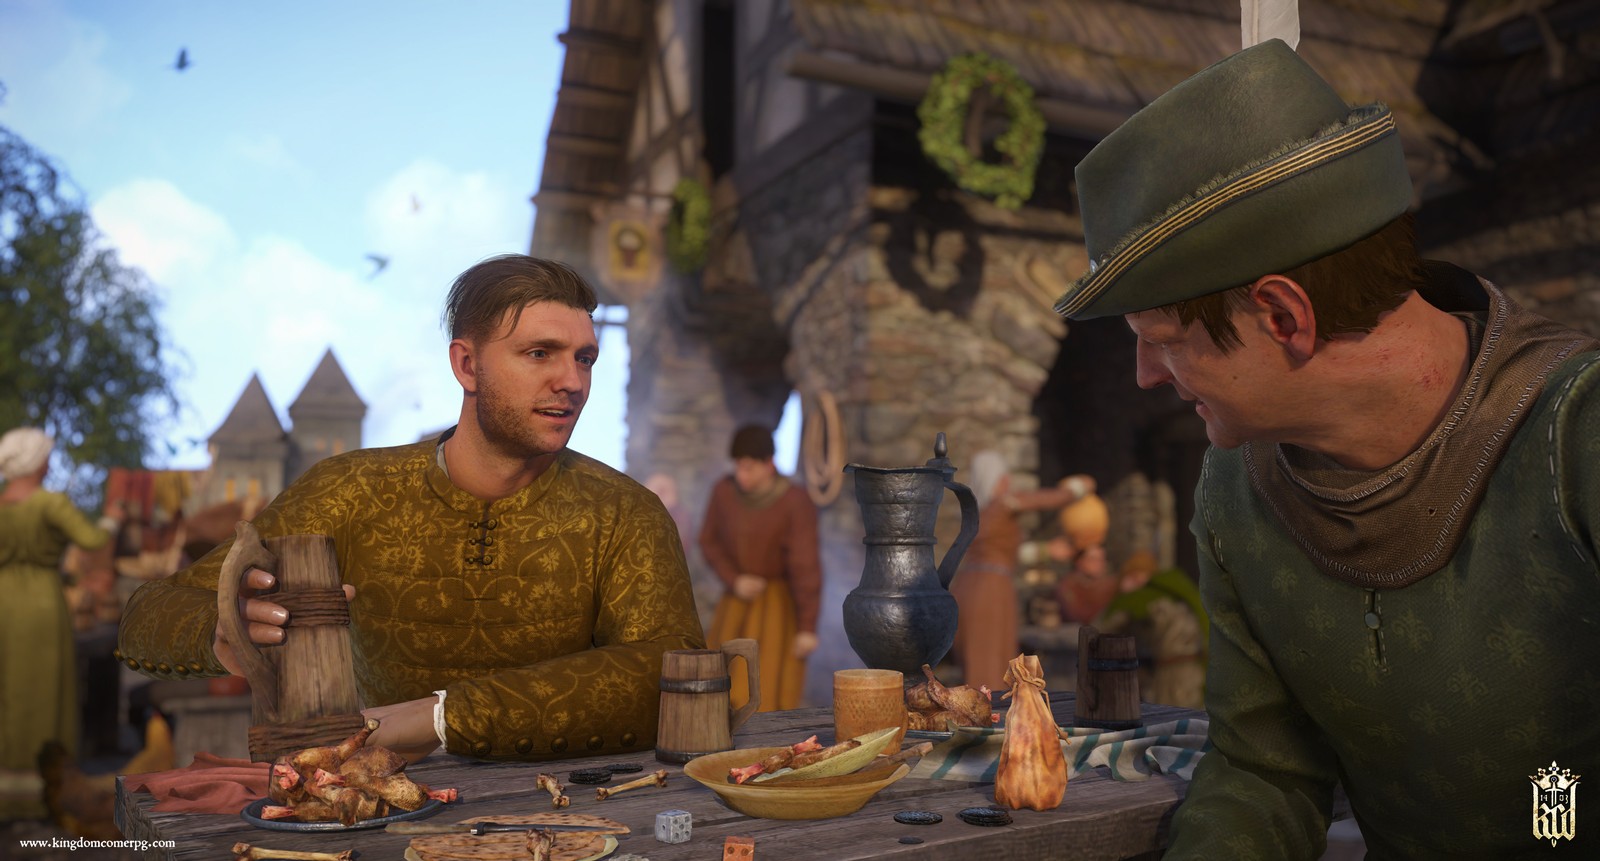
Texturing is absolutely crucial to game design. Take Warhorse Studio's 2019 release Kingdom Come: Deliverance -- a first person RPG set in 15th century Bohemia, an old country of mid-East Europe. The designers were keen on creating as realistic a world as possible, for the given period. And the best way to draw the player into a life hundreds of years ago, was to have the right look for every landscape view, building, set of clothes, hair, everyday items, and so on.
Each unique texture in this single image from the game has been handcrafted by artists and their use by the rendering engine controlled by the programmers. Some are small, with basic details, and receive little in the way of filtering or being processed with other textures (e.g. the chicken wings).

Others are high resolution, showing lots of fine detail; they've been anisotropically filtered and the blended with normal maps and other textures -- just look at the face of the man in the foreground. The different requirements of the texturing of each item in the scene have all been accounted for by the programmers.
All of this happens in so many games now, because players expect greater levels of detail and realism. Textures will become larger, and more will be used on a surface, but the process of sampling the texels and applying them to pixels will still essentially be the same as it was in the days of Quake. The best technology never dies, no matter how old it is!

